XS650 Hydraulic Clutch Conversion – Install Instructions
WE NO LONGER SELL COMPONENTS FOR THIS SWAP – Read carefully the instructions below on how to install this system on your XS650
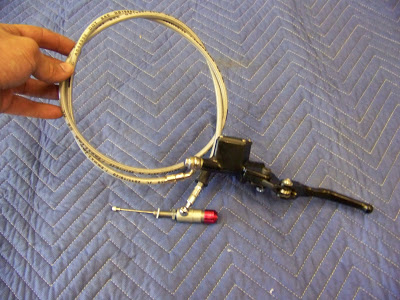
*If you search Ebay for a ” Pitbike Hydraulic Clutch” – you should be able to find a setup similar to what is pictured below. You’ll want about 50″ of Hose, or 1270mm length. I know you can find 1200mm units that seem to work just fine. I’m leaving this tech up for you folks as I know alot of ya’ll want to do this swap.
Install is simple… Like on a scale of “I know how to push the start button” to “I Am a Wizard and Have No Use For a Motorcycle” this falls in the Category of “Rides and can fix a Chain” simple…

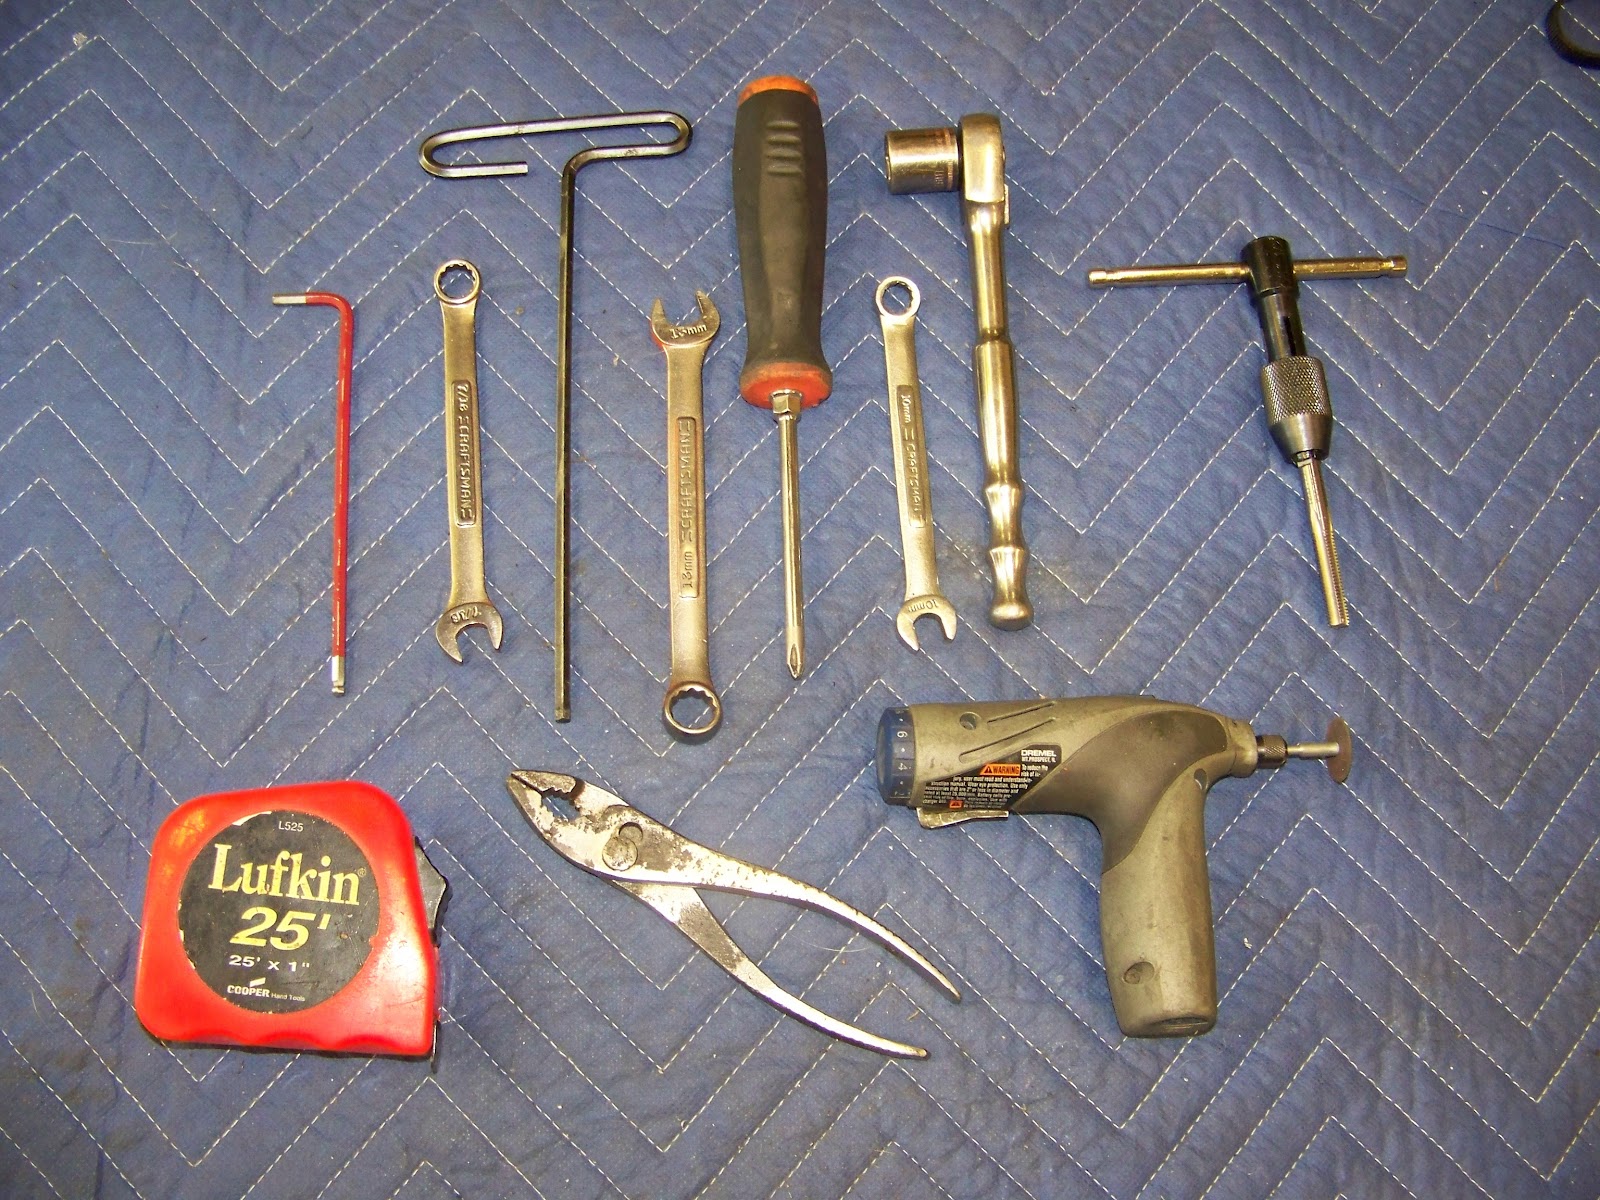
What kinda tools will you need? Well, you own an XS650, so you already have 99% of what you need if you have even worked on it just once…
Allen wrenches, a few open end wrenches (some standards in there just to throw you off too – such is life….) and a the other goodies you see below…
Now, lets get started! Lay out a good clean work place for working on your motorscoot. This will make it easy to keep track of all the hardware and parts you remove, as well as keep you from sitting on the cold damp ground that is your dirt floored shed or gravel driveway… Hey, I’ve been there for more years than not! A little something like this makes life all the better…

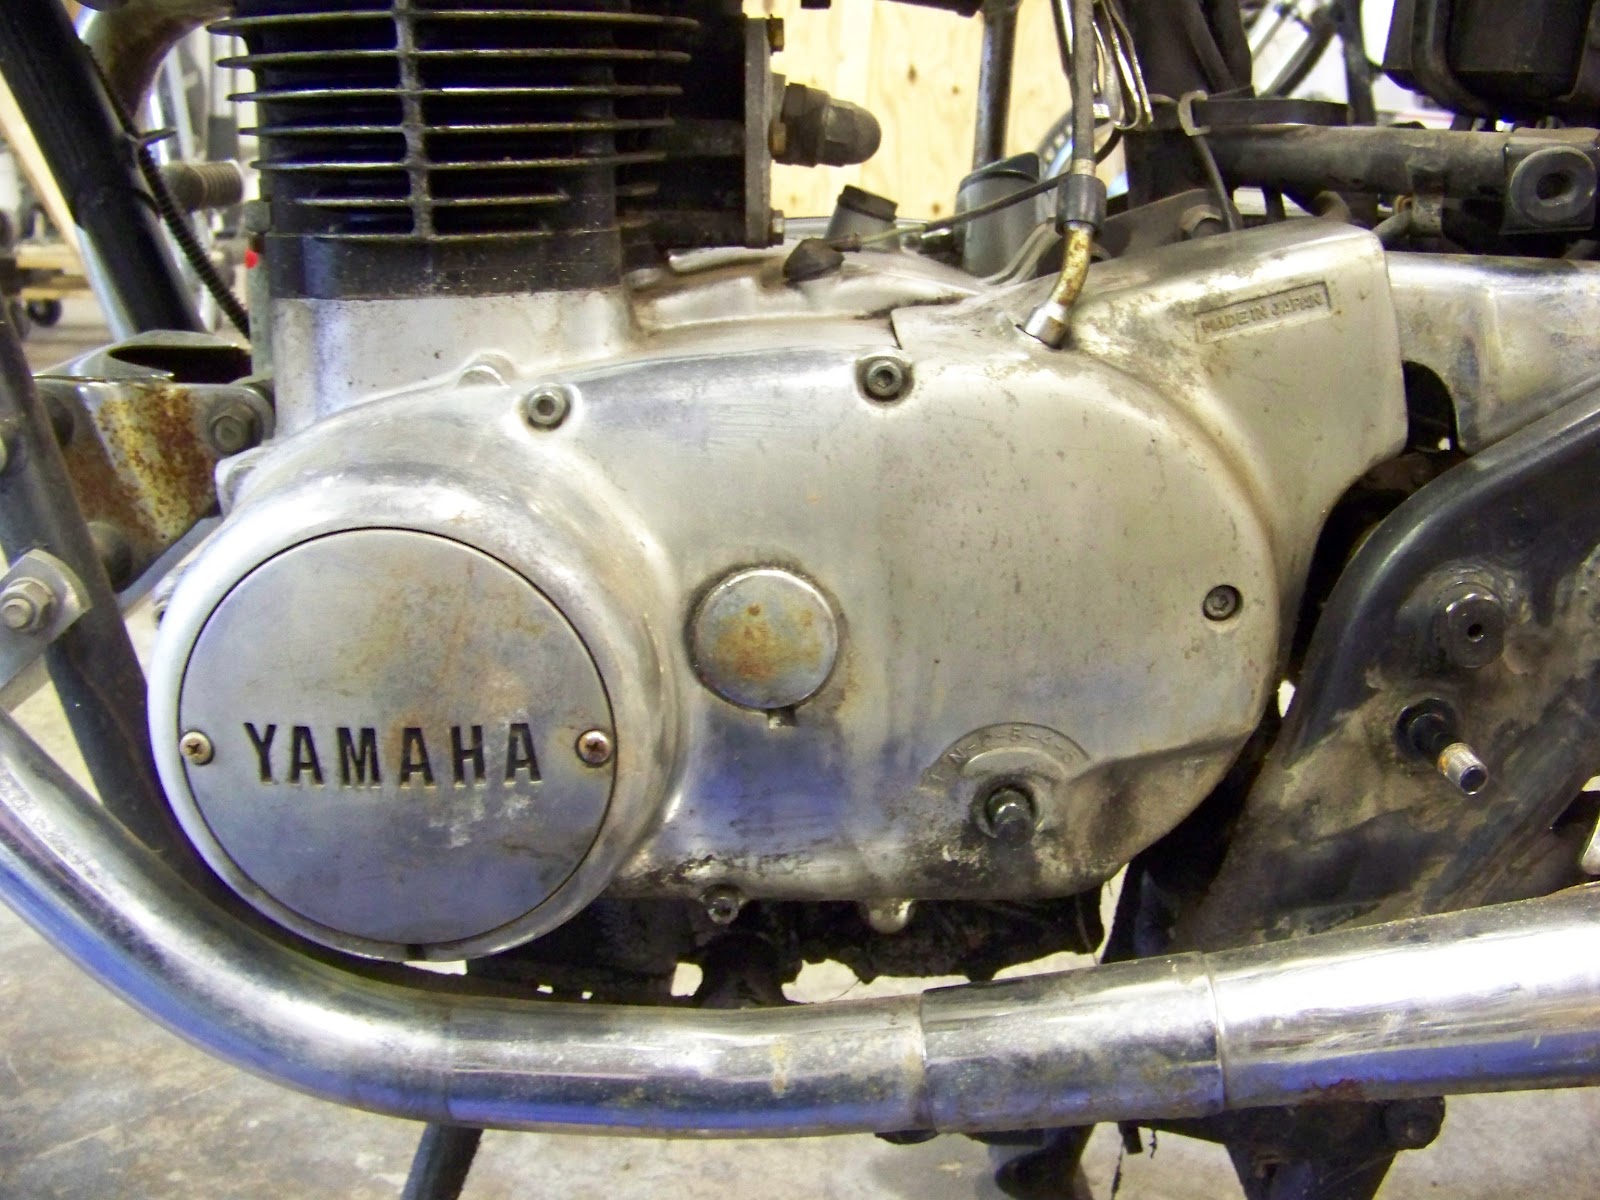
As you can see, we will be installing this one the worlds UGLIEST XS650… No offense to all you Special Lovers our there, but this thing looks like the aftermarket XS650 catalog from 1983 threw up all over it! Sissybar, luggage rack, highway bars, highway pegs, king and queen seat, and the like… But it’s ok, we are reviving this ol’ gal and gonna ride her as is…
*Note, the carbs are already off of this bike, and being rebuilt. I do not believe you will need to remove them for the Hyd. Clutch Swap…
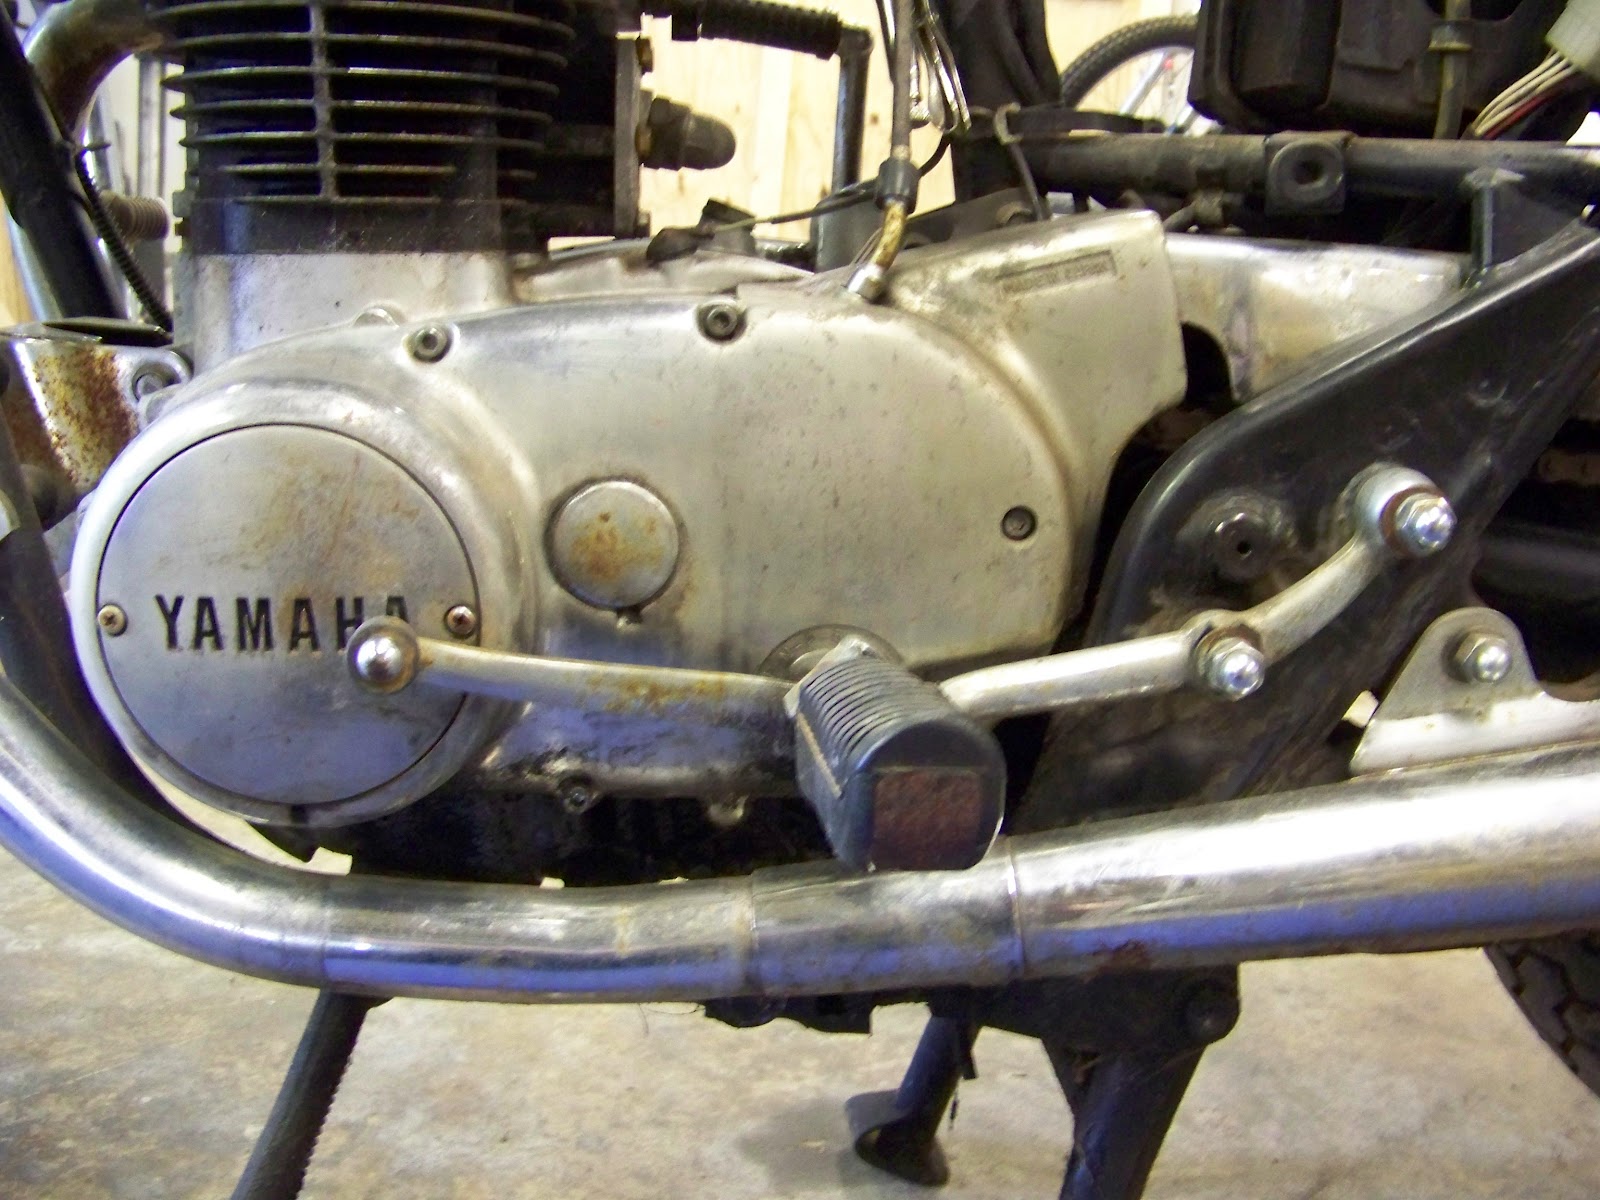
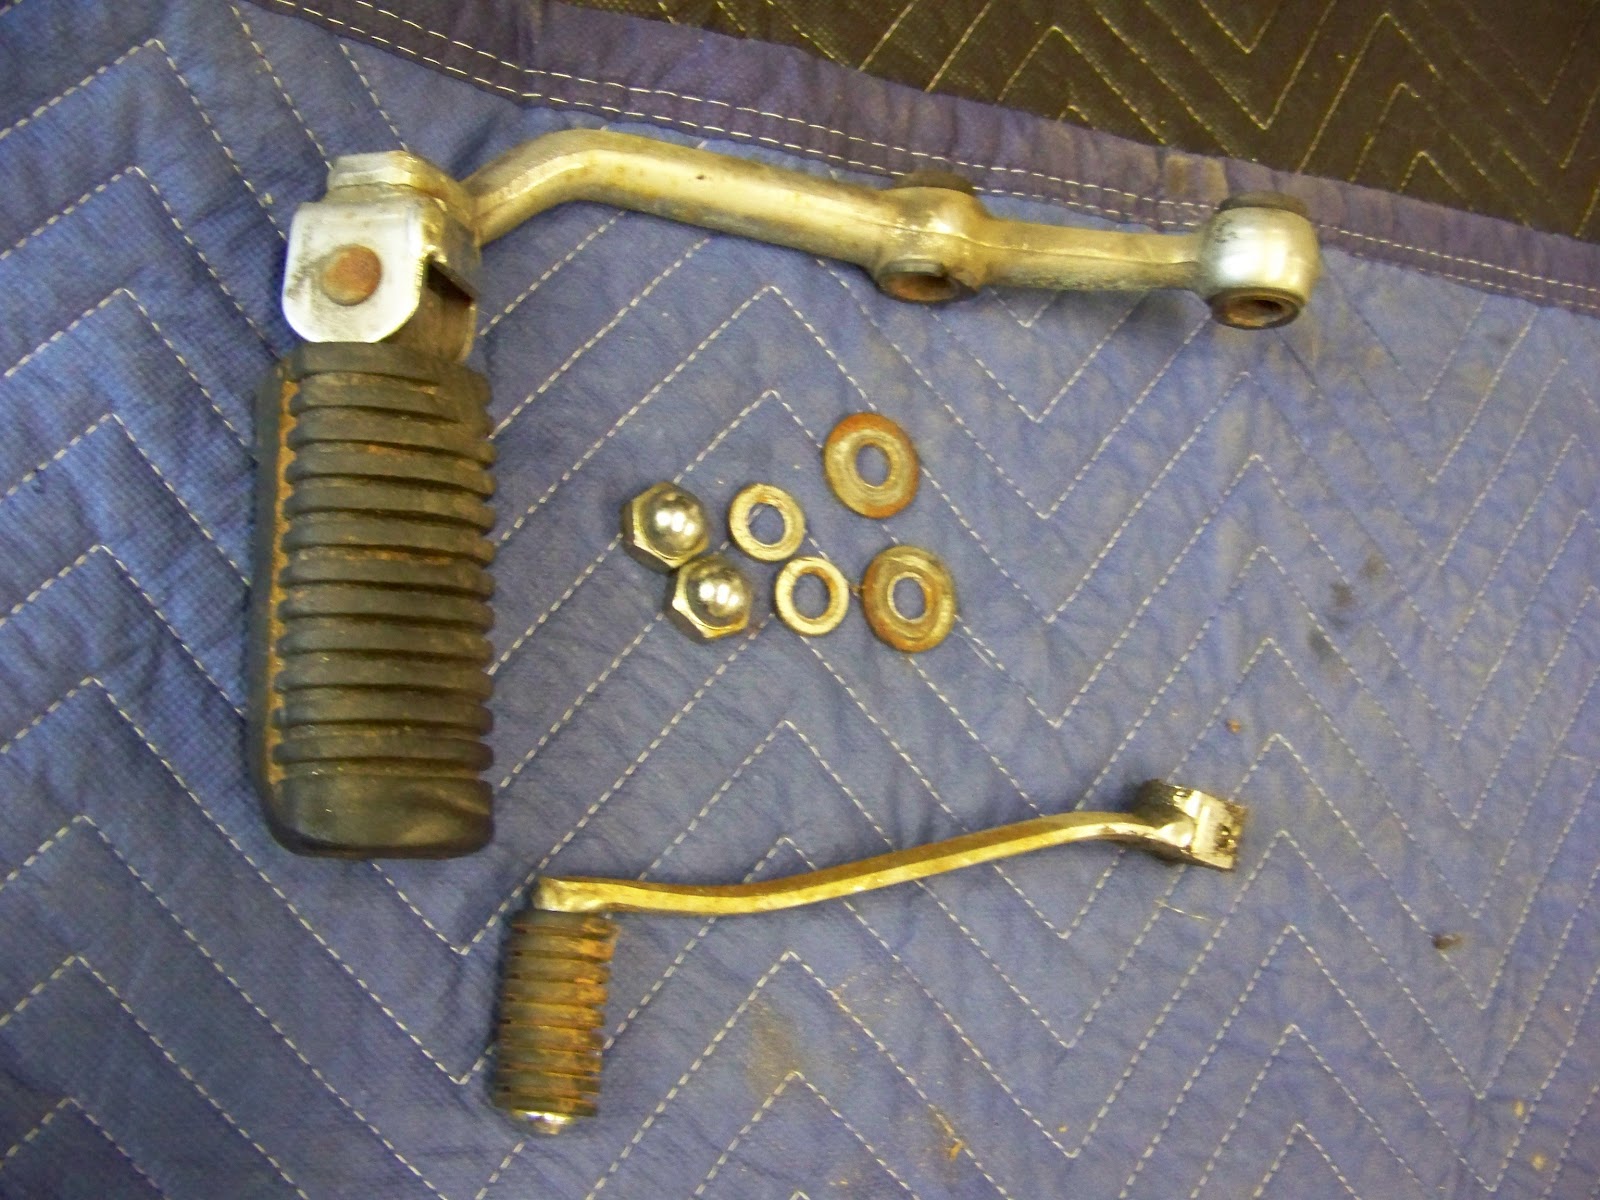
Remove the left side peg and shifter lever.
You are roughly 22.65% finished already… Seriously…
When you pull the side cover, it will probably look like pure oily death under the cover… That’s because it is…
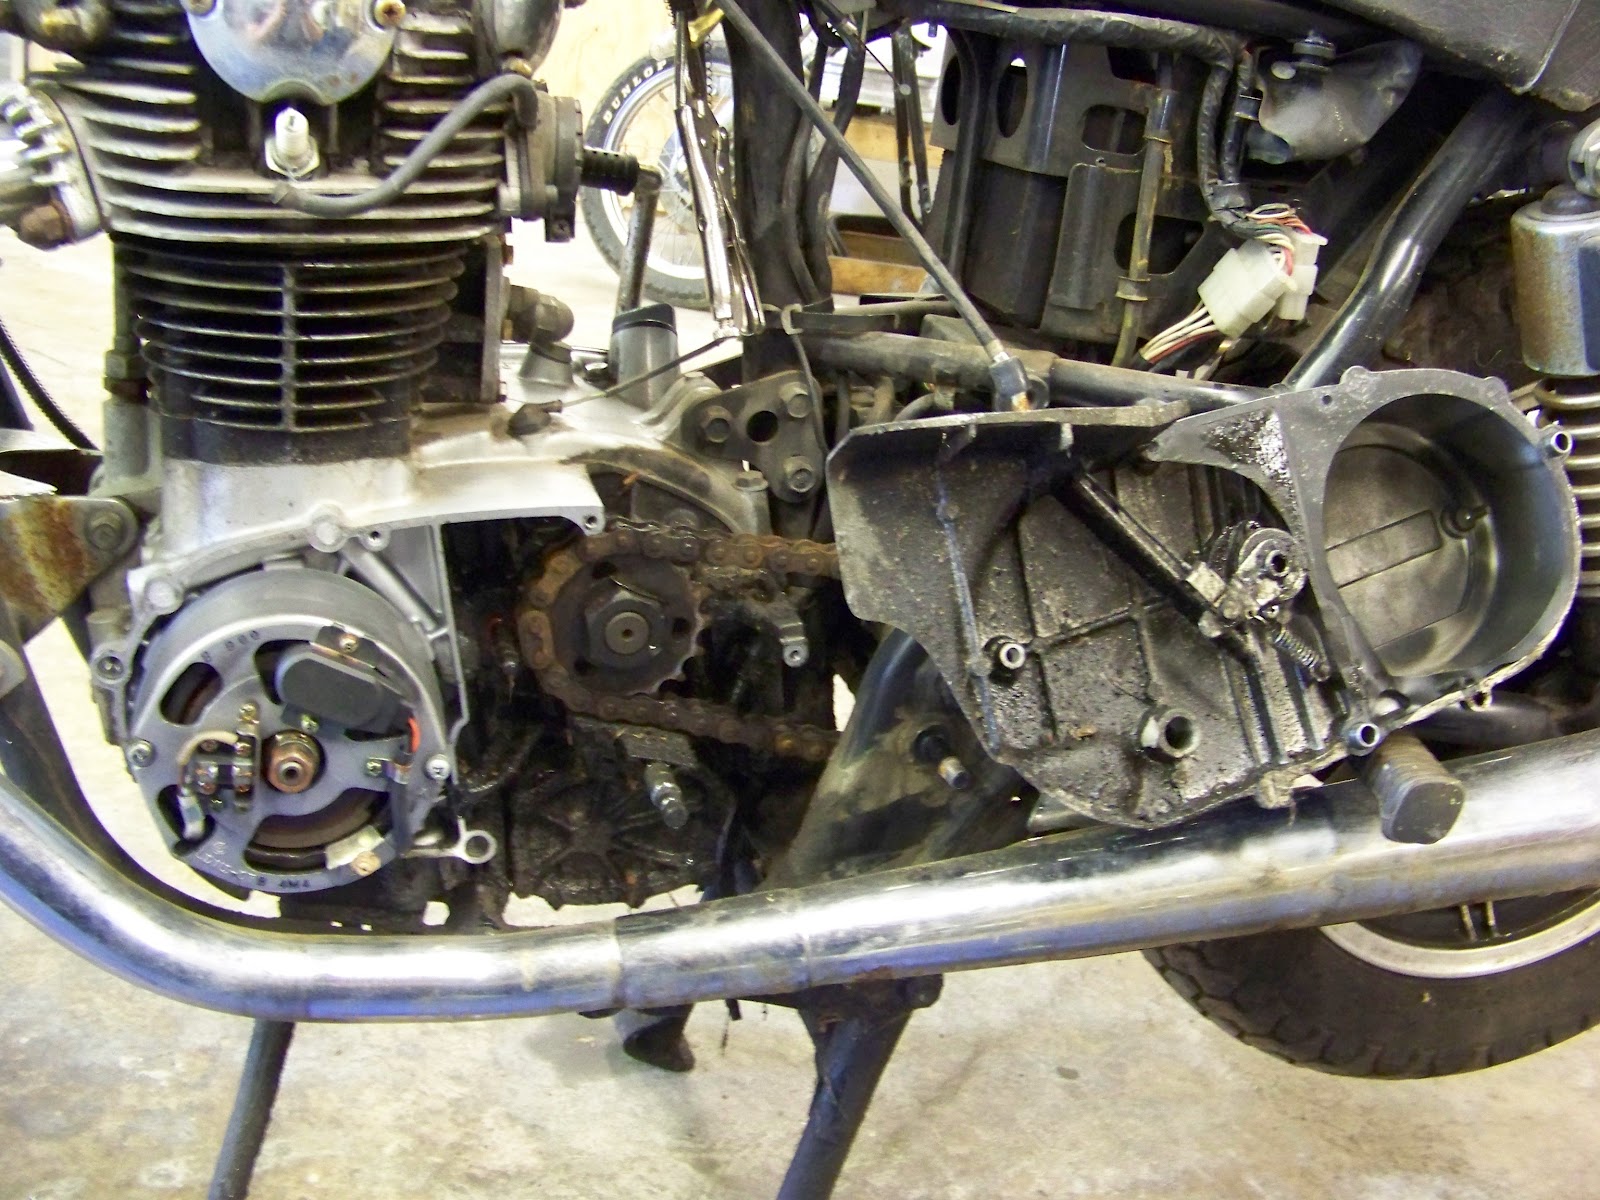
Leave the cover attached to the clutch cable, until you have measured the distance between the cover and the end of the clutch actuator cable housing.
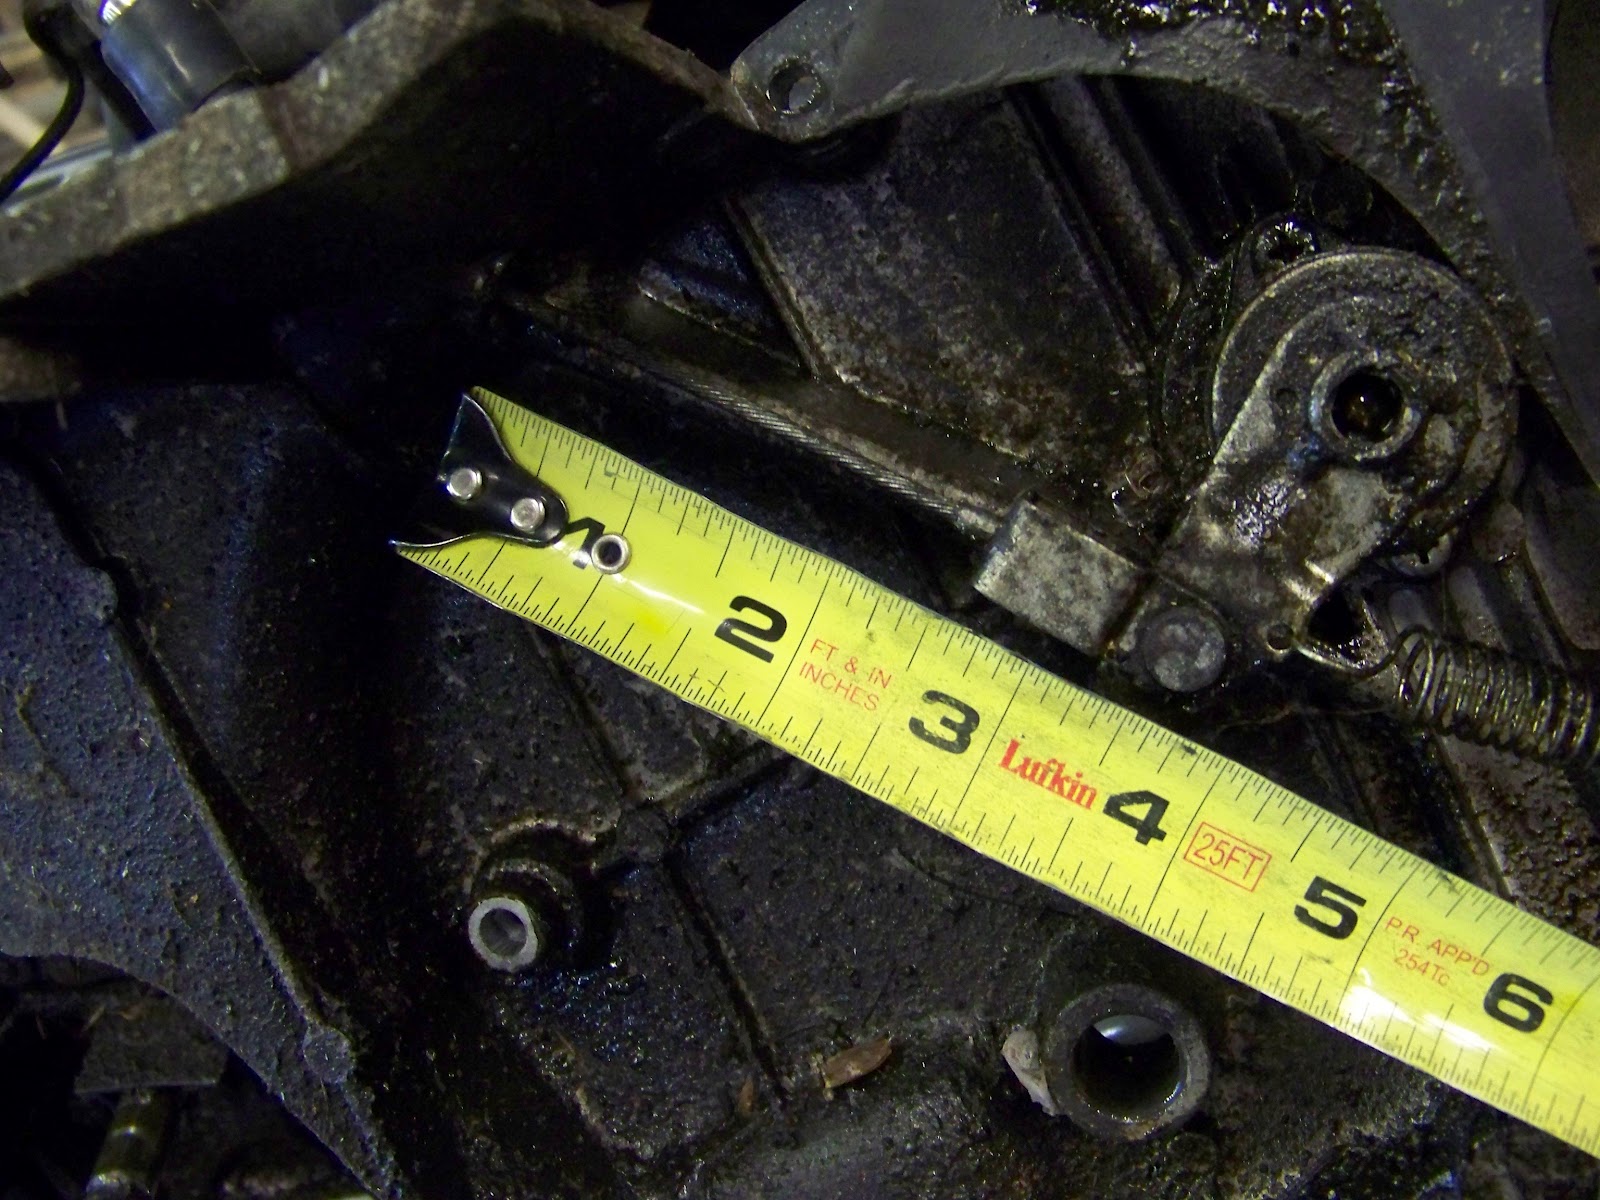
*Note: If you are building a bike from scratch, or have already ditched the OEM components, don’t sweat this measurement… The HHB Hyd. Clutch is designed to be a fairly forgiving install. Just use somewhere between 2.5″ and 3″ as a starting reference.
Go ahead and remove the cable from the side cover. There is a small “tab” keeping the cable from releasing from the actuator. Just bend it back and pop the cable out.

Now is a good time to think about upgrading a few components of your clutch system. A 1 Piece Clutch Rod, and a new HD Throwout Bearing are nice upgrades while you are beefing up your clutch system. you’ll have to remove the left side cover and clutch basket to do them, but it’s a worthwhile upgrade. You can purchase those items from most popular XS650 Supply Houses. Might as well toss in a new seal while you are at it, seeing as how this is the cruddiest location of most XS650’s.
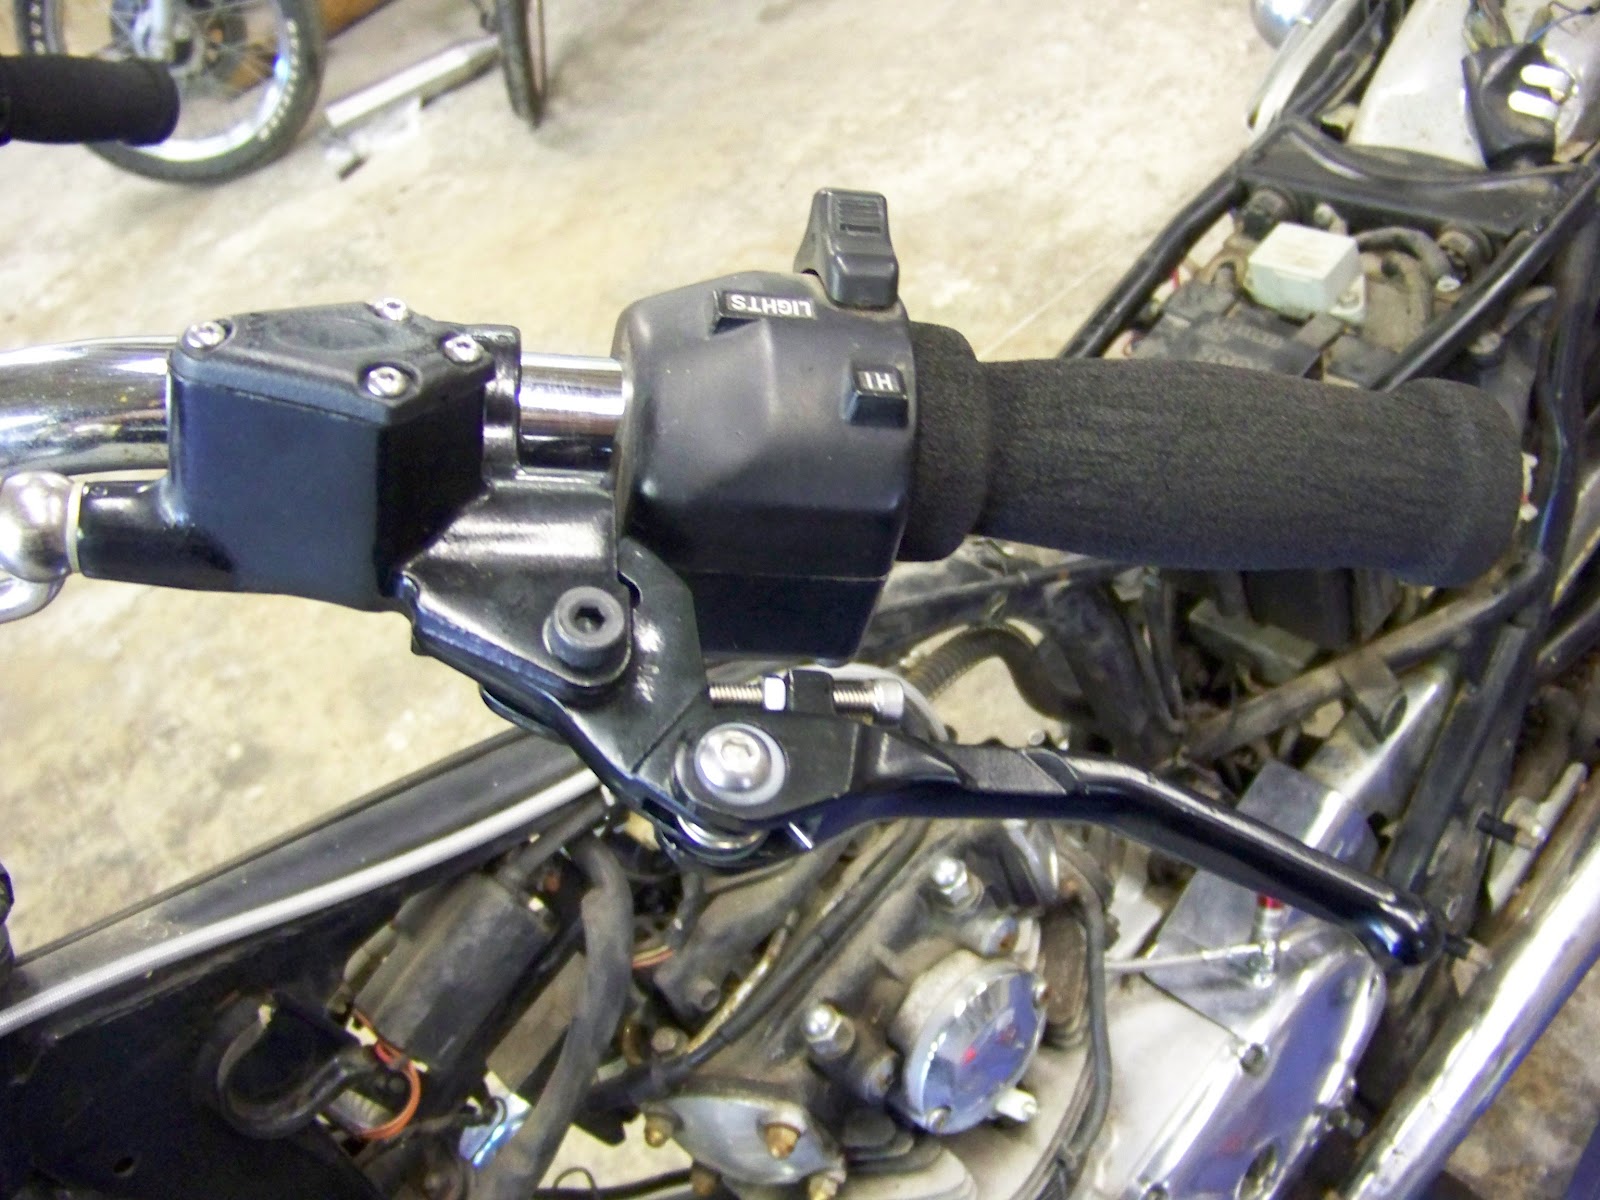
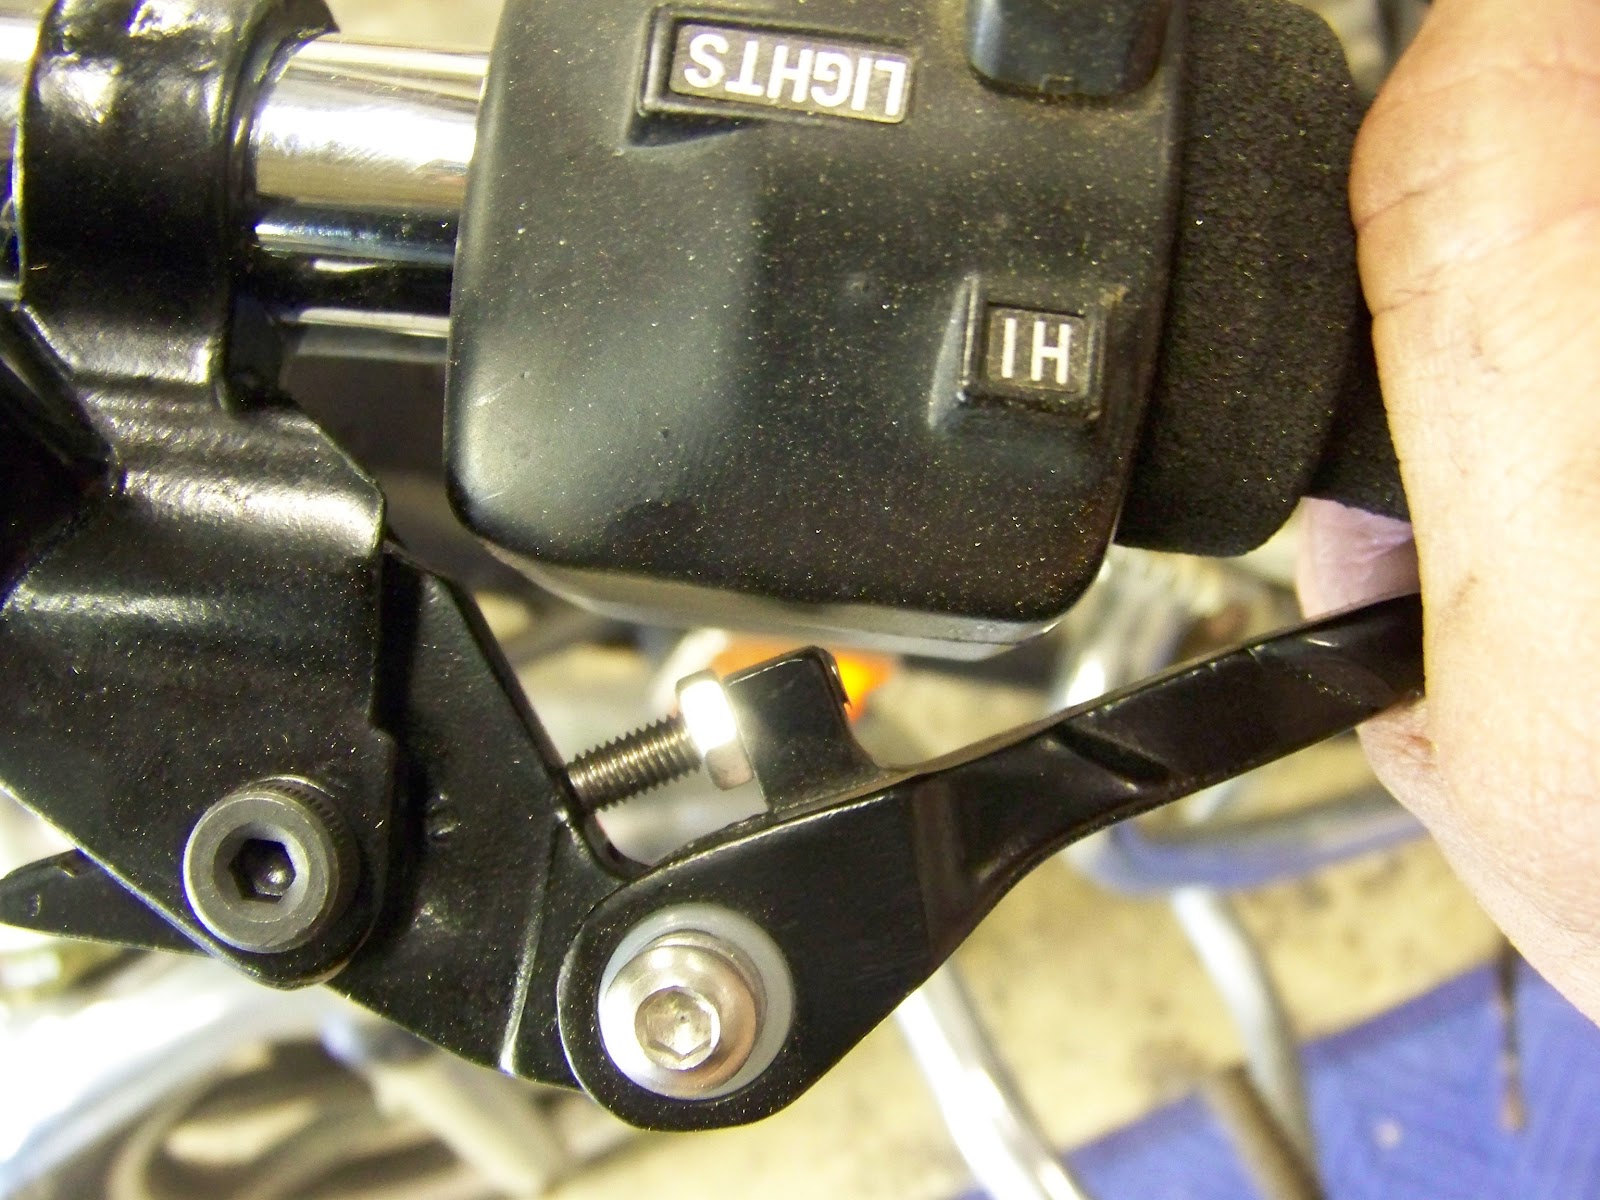
Now to the bars, remove the left side control pod, clutch lever and grip…

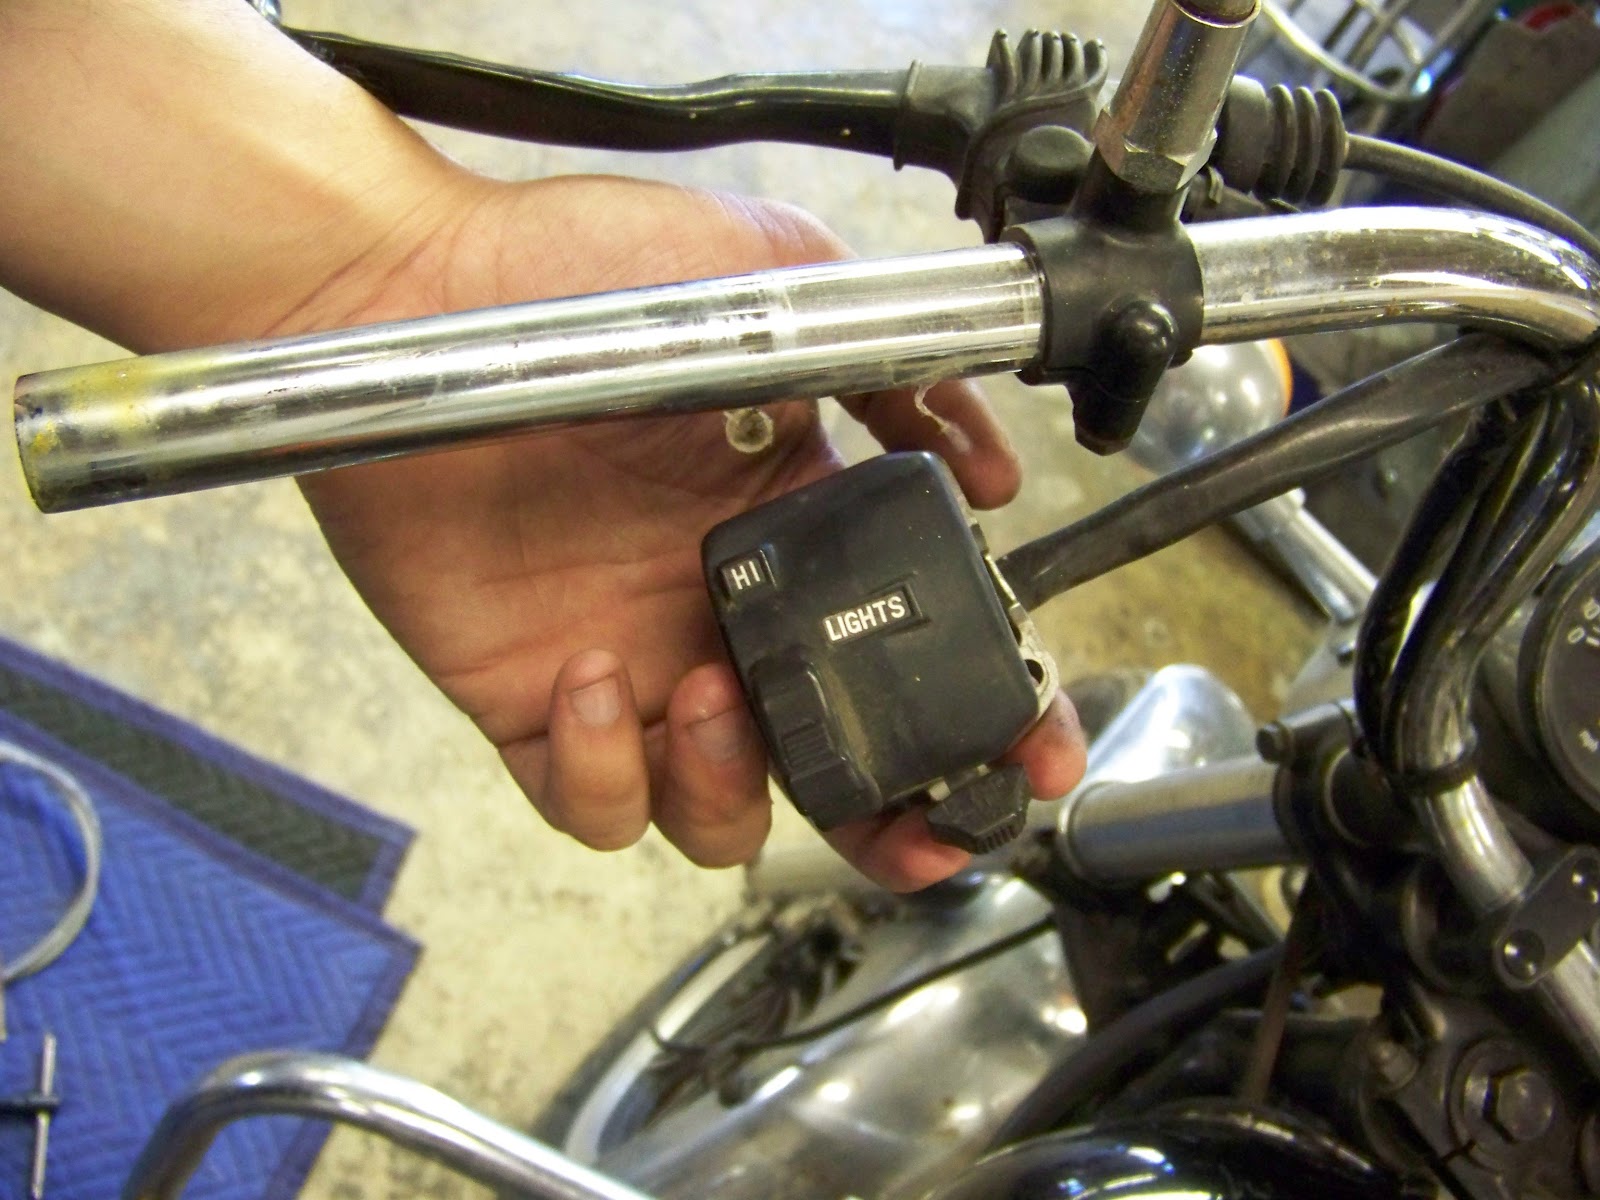
Line up the adjuster nut on the clutch lever with the slot on the lever itself. This will allow the cable to release from the lever… Or, you could just use some wire cutters and snip that sucker… You aren’t going back to a cable after this, and that thing has been cramping your hand and making neutral impossible to find for your entire ownership of this bike! Get a little revenge if it makes you feel more in tune with your machine…

Discard the cable… Now follow the clutch safety switch wiring into the headlight bucket. We’ll be deleting this part with the conversion as well. I’ve typically found most of them were broken to start with… Unplug the green connector inside the bucket, and route the end of the plug out of the headlight…

What a rats nest! I personally ditch all the OEM wiring, set up a PMA for the charging system, and run a Pamco for ignition. Then delete the control pods and turn signals, and you’ll have the worlds simplest XS650 wiring.. But that’s just me, and I like to cover all the bases.
Undo the green plug, and remove the wiring with the clutch lever…

*Note: If you fully intend on keeping all of the OEM wiring, you may need to create a jumper connection here if the bike will not start when you are finished. A jumper is just a simple wire with two ends that plug into the original plug. If the bike will start without doing so, then don’t sweat it.. Every bike is a bit different. Plug colors may change, and some models don’t even have a safety switch to start with…
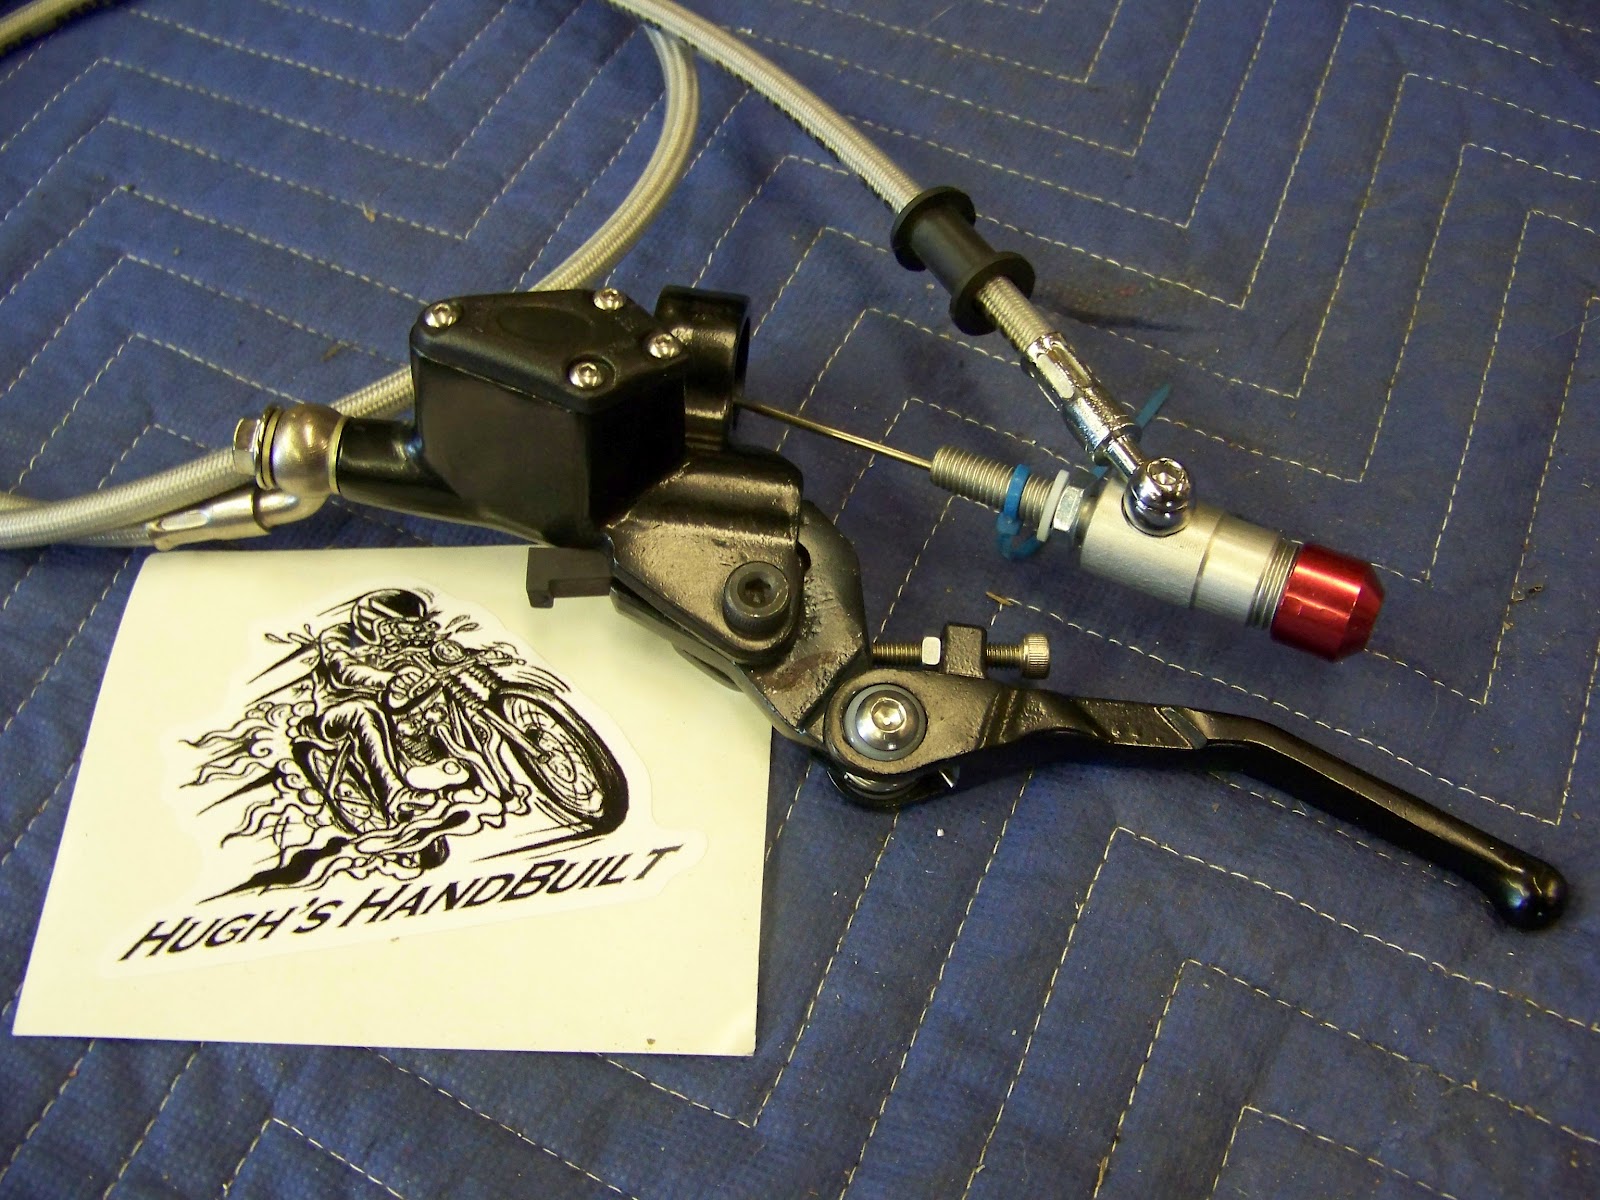
Now, time for the new goodies. You’ll notice that the new Hugh’s HandBuilt Hydraulic Clutch Conversion comes fully assembled. It is also pre-bled for your convenience, so take care not to loosen any of the fittings when handling the unit.

Go ahead and remove the tank and seat.

Slip the clutch handle onto your bars. Then route the slave cylinder through the chassis along with the hose to your preference. All installs are a bit different, this is just a guideline… Again, take caution not to break the seal between the hose and the slave cylinder.
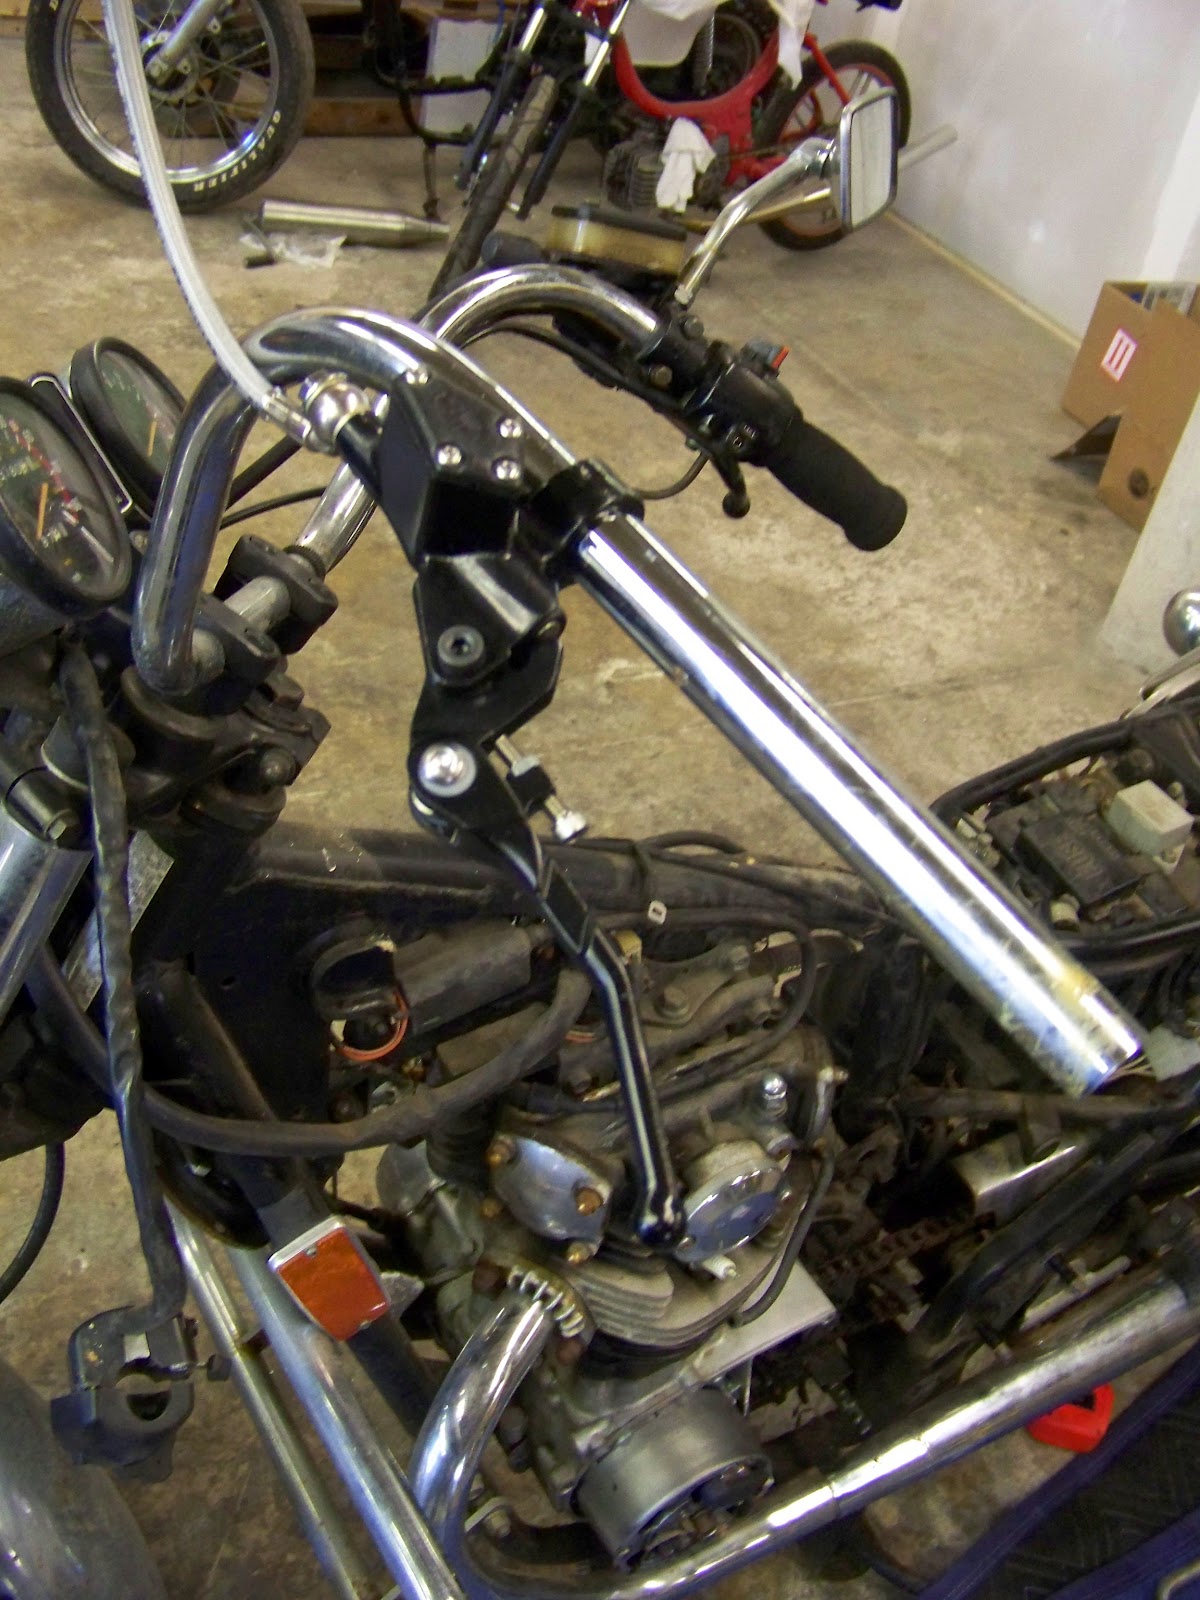
Route the cable and cylinder…


Ok, so I am going to use a cleaner side cover we had laying around the shop instead of spending 3 days cleaning that gunky nasty original cover… So just imagine you can do the same – haha…

Go get yourself an M8 x 1.25 tap and handle… This is the only “Special Tool” you really need for the conversion.

Then using a bit of tapping fluid (or any kind of oil really) cut new threads into the side cover where the original cable mounted. There is no need to drill out the hole, it is the proper size for the tap already (see, we were really trying to make this as easy as possible for you folks!)
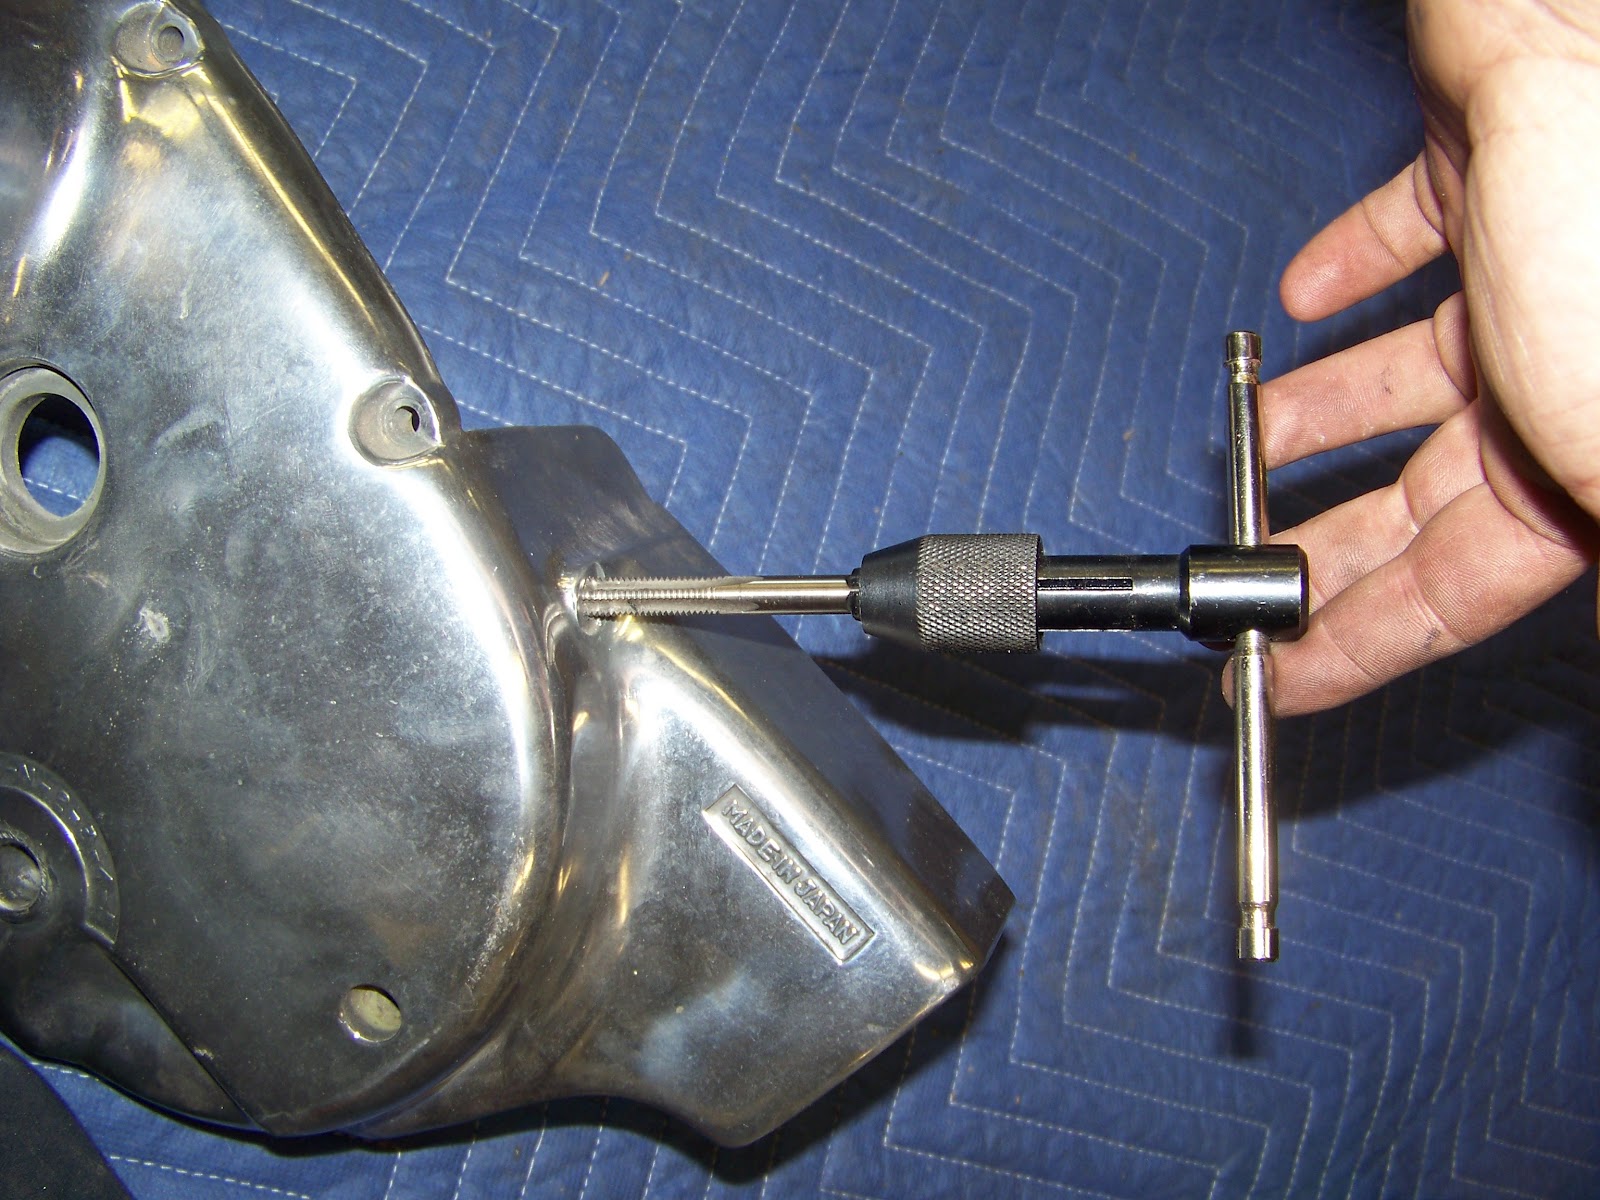
Tap all the way through the hole…

Now you need to clean up the clutch worm gear mechanism… Check it for being overly worn, but most are in good shape. If it is worn out, source a replacement. This bike was purely neglected and has about 15K on it, and the worm gear was in great shape…
I swapped the mechanism over from the original cover, but you don’t have to do that – just make sure it is clean and lube it up with some bearing grease and you are set.

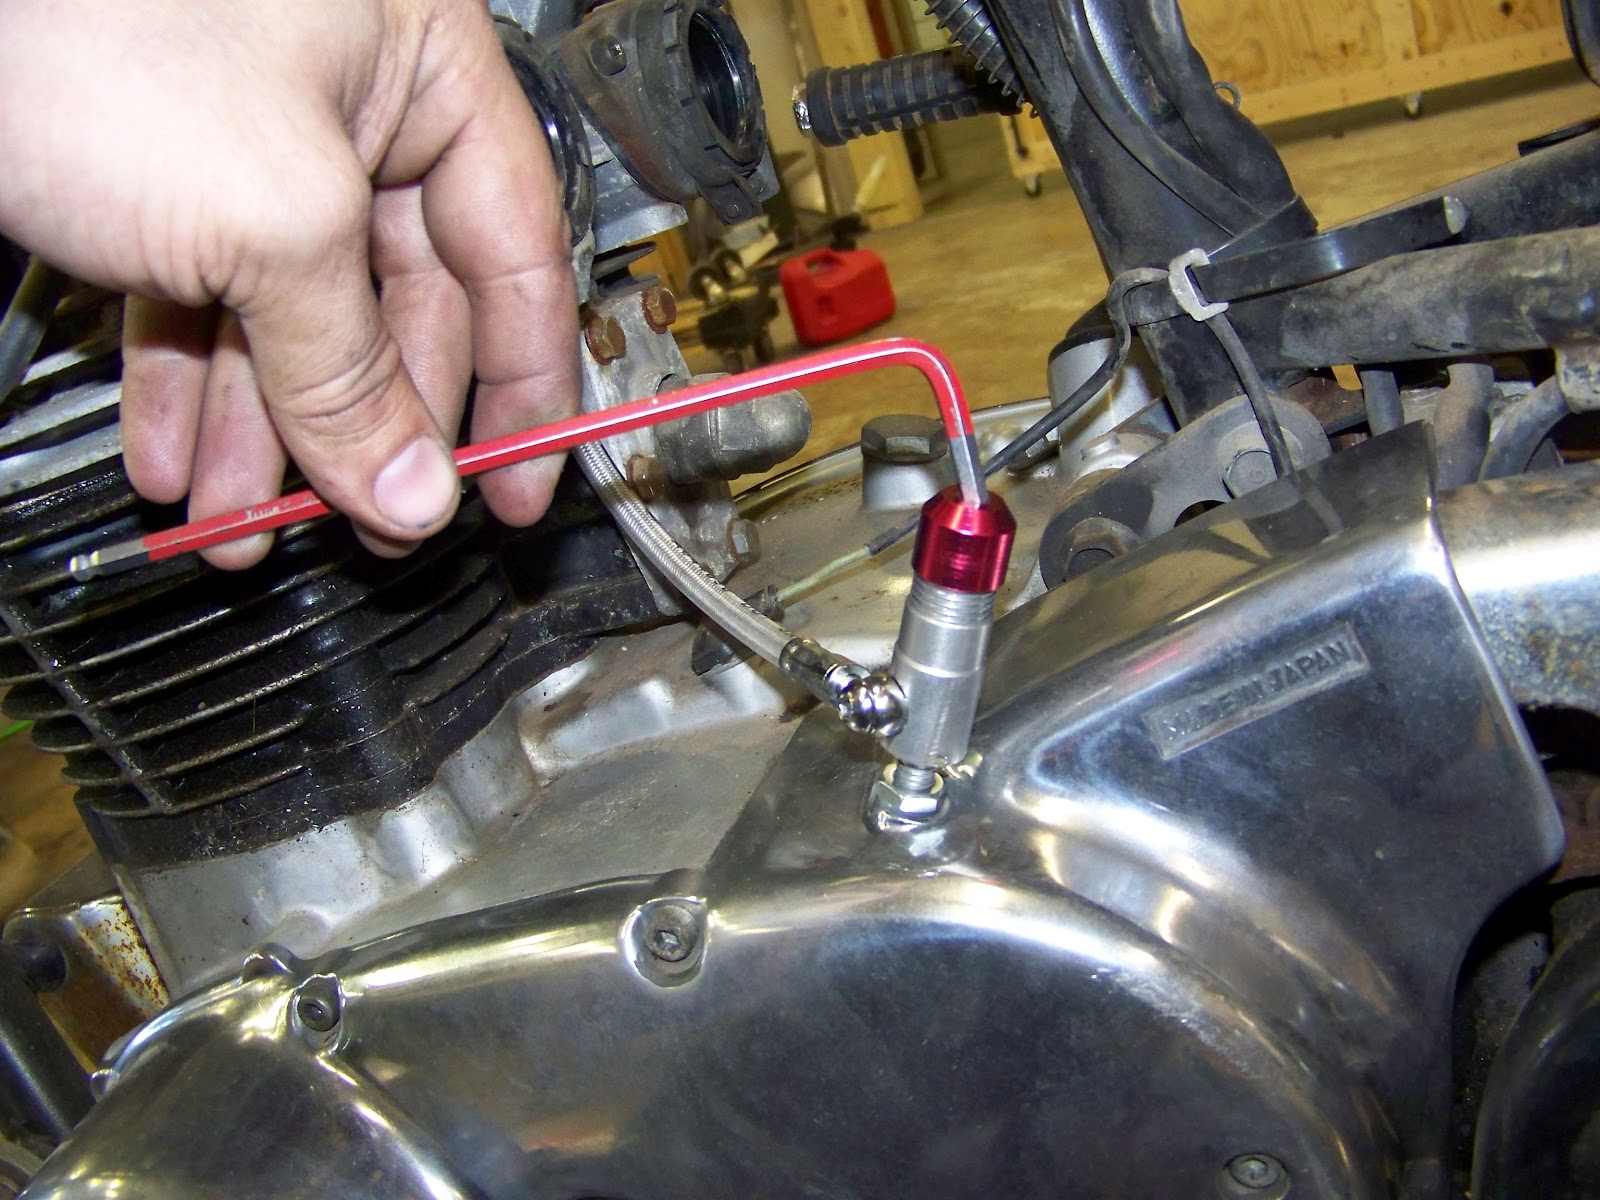
Now it gets a little awkward. Since the Slave Cylinder is already installed on the clutch hose, you will need to “spin” the clutch cover onto the Slave Cylinder. Do not try and wind up the hose, it won’t like you. Spin the cover until the slave cylinder is positioned like below. Make sure the nylon washer is below the jam nut.
You may need to rotate the cylinder around the hose fitting so that the hose routes “UP” while doing this. Keep an allen wrench handy, and keep it lightly snug while doing so. Try not to break the seal on the hose/slave cylinder connection.

Now, you want to replicate the original dimensions of the clutch cable mechanism. You may need to grab the end of the Slave Cylinder Rod with a pair of pliers and pull it out fully, especially if you got all happy with the lever and pulled it a few times… It’s ok, I do it too…

Once you have the height where you like it. Bend the “tab” back into position, keeping the rod from coming loose from the mechanism.

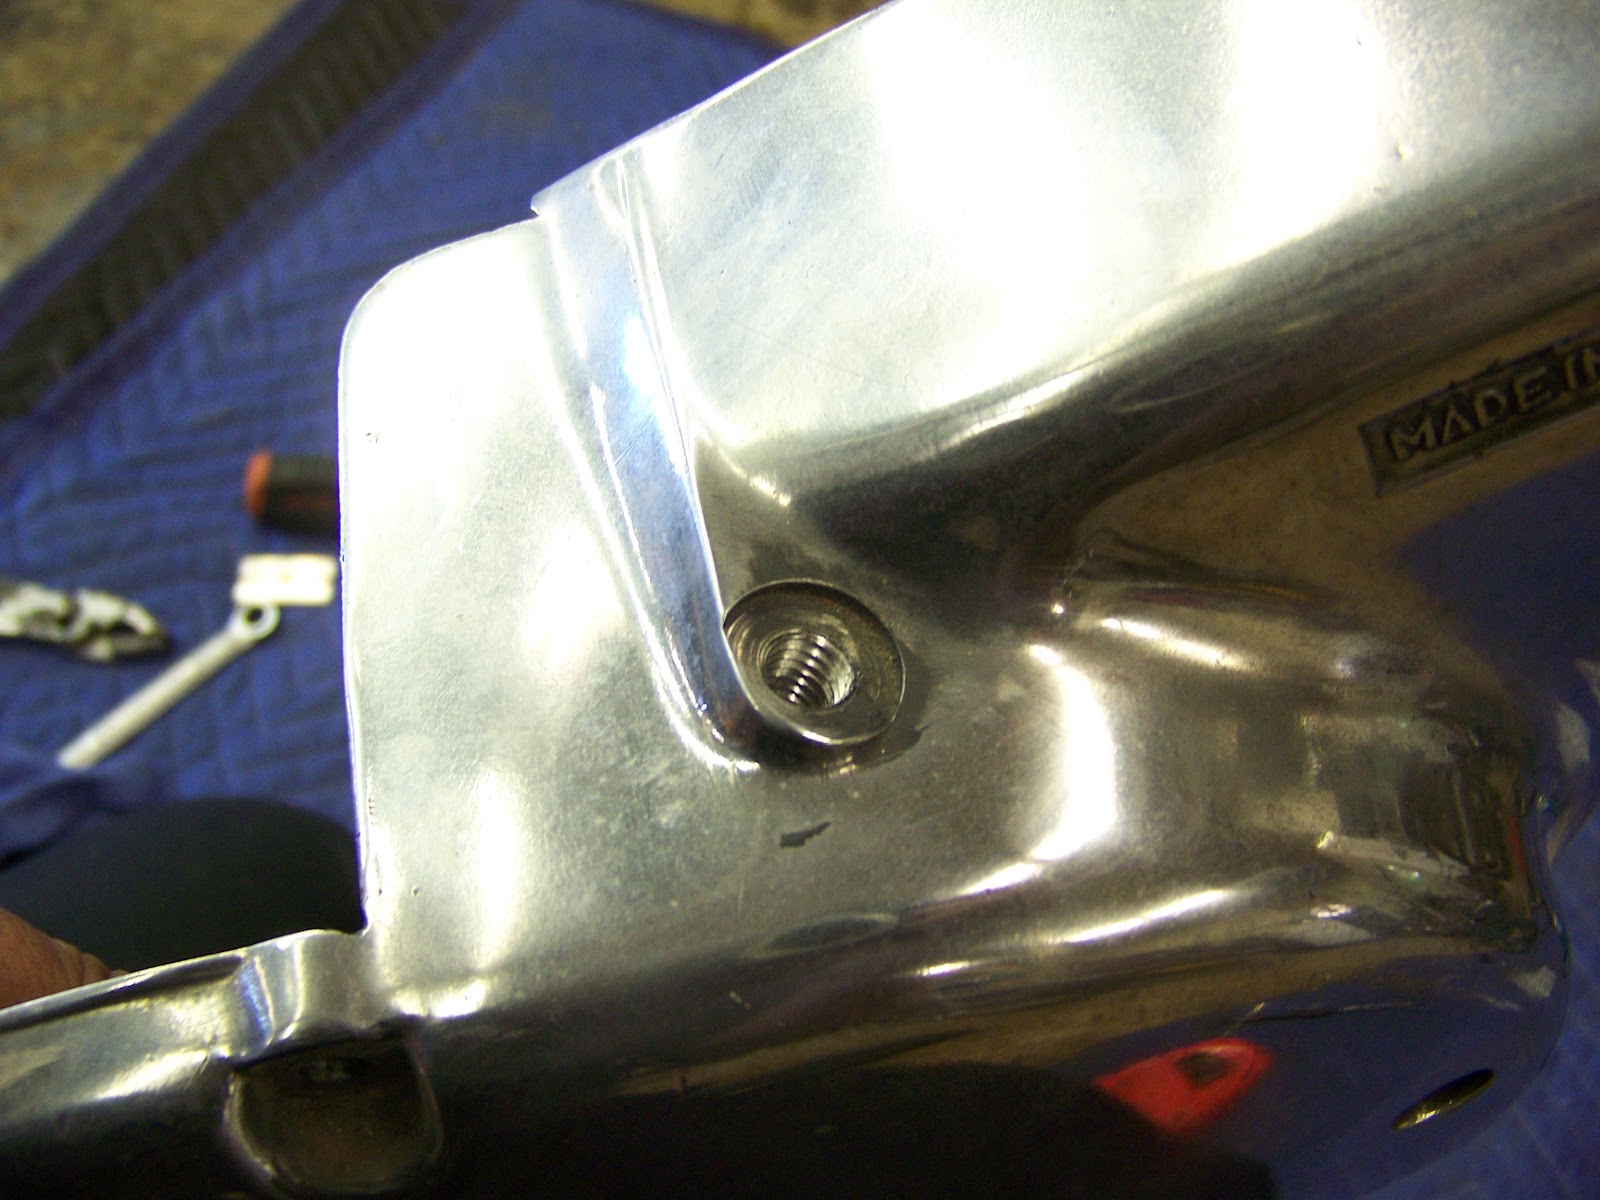
Then lock in the jam nut against the side cover. The Nylon washer protects any painted, powdercoated or polished finish you have have on your parts. Again, thinking ahead to make your bike that much nicer…

Route the hose where it suits you. I just happened to run this one between the carb boots, but wherever you choose will work just fine. Make sure to keep it away from sharp edges (think gas tank seams, frame tabs, etc..) but just in case you can’t, there is a rubber grommet on the cable that you can use to keep the cable safe.
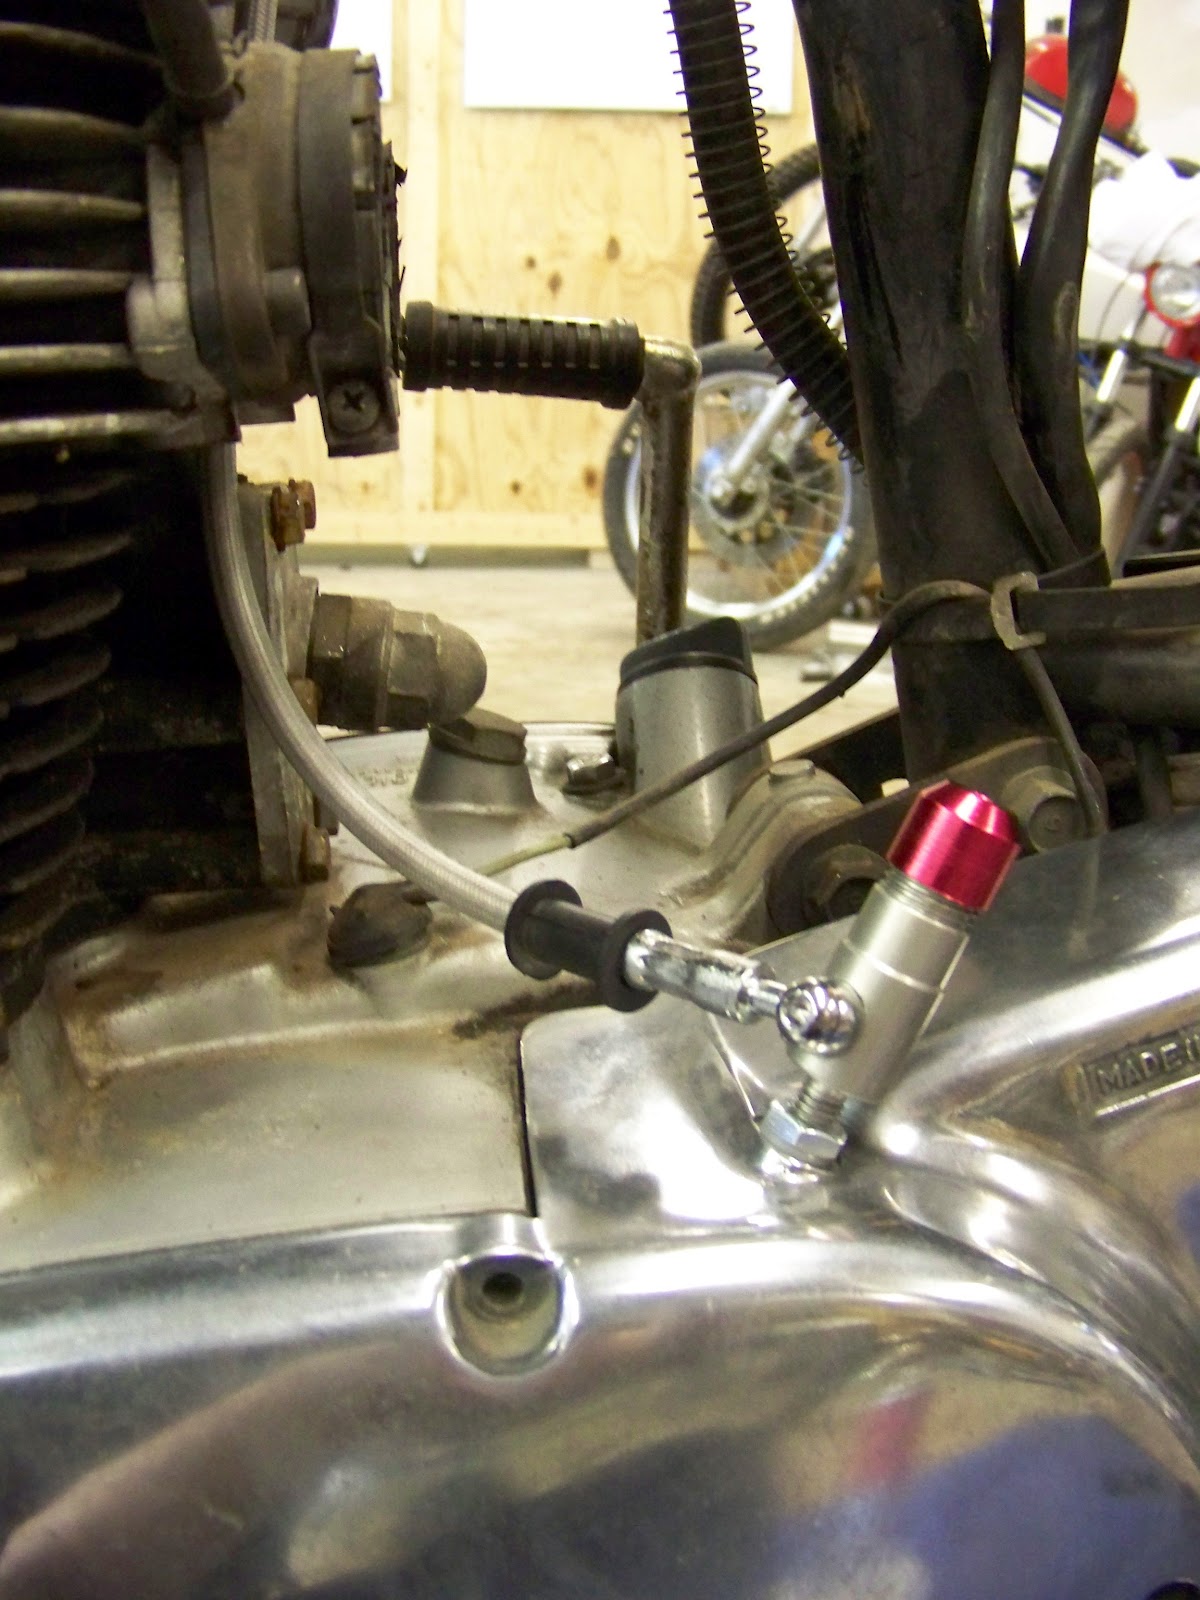
Make sure the banjo bolt is still snugged down from all the movement during the install.

IF you are keeping the control pods on your bike, then reinstall them now. Along with the hand grip. If not, just disregard some of this…
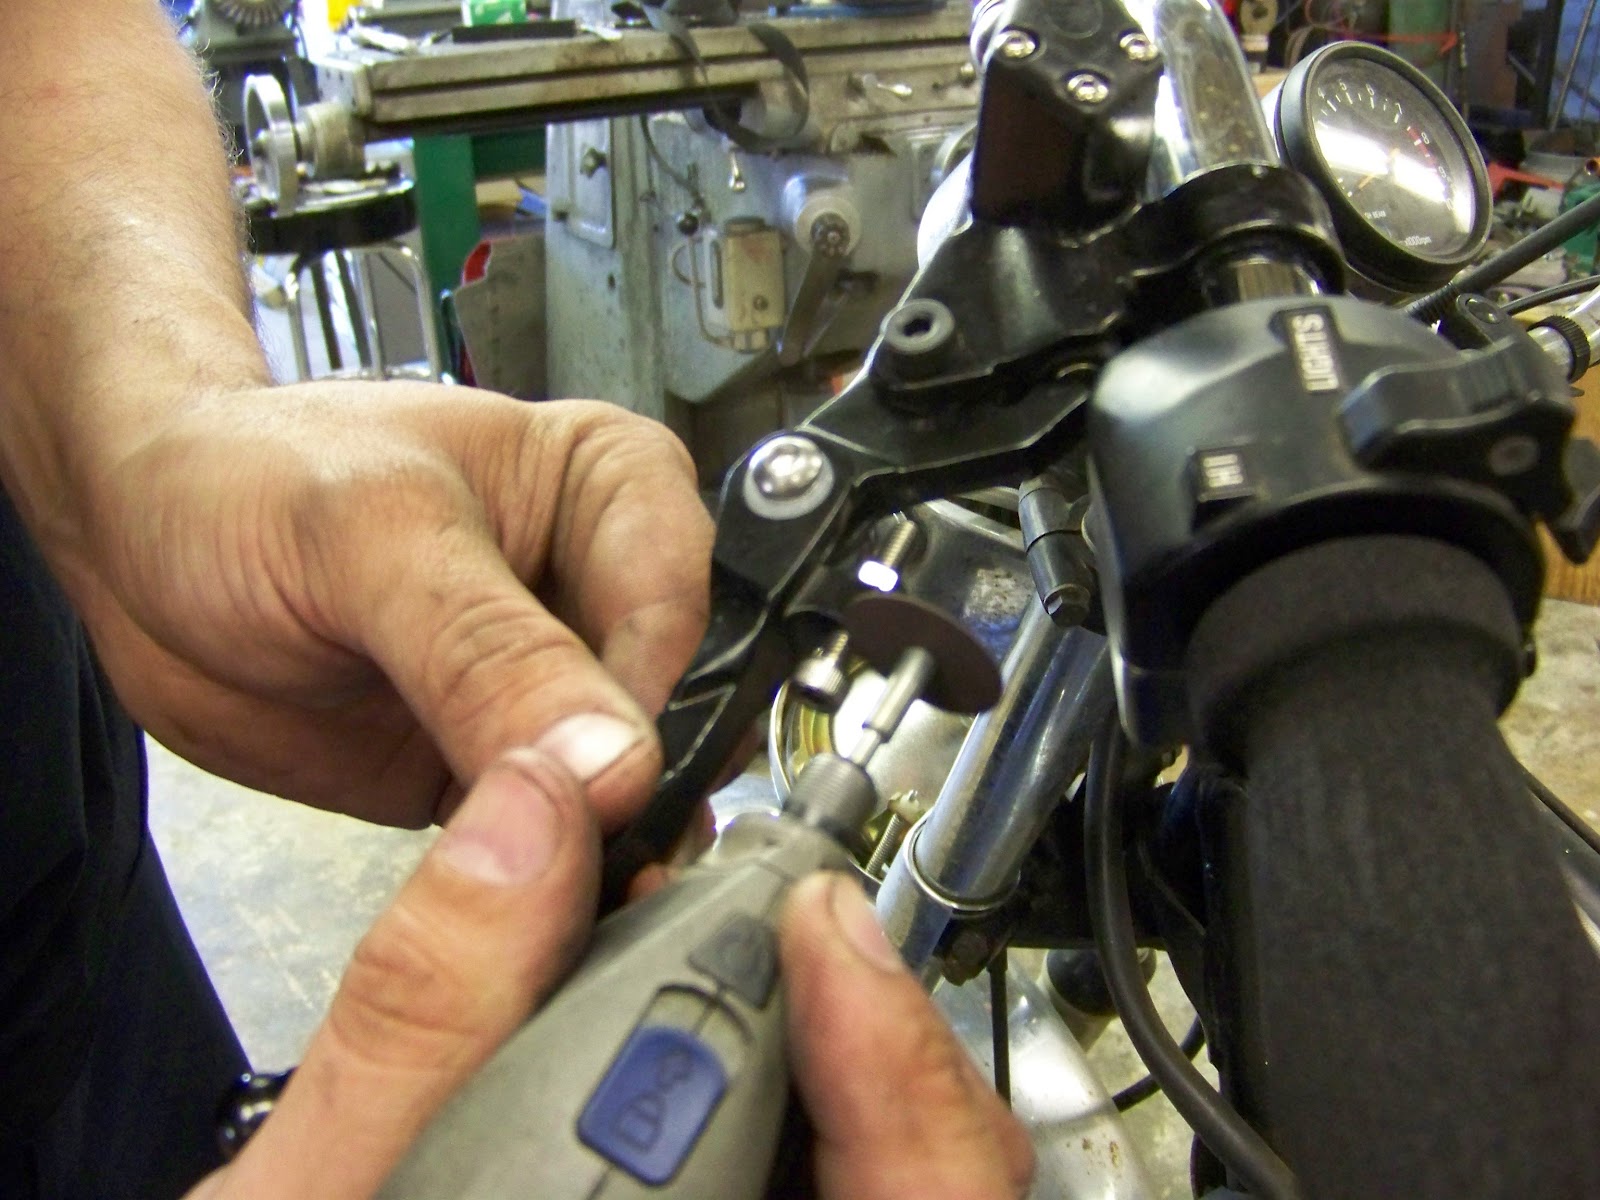
The lever is adjustable, which is an nice feature. So get the lever positioned where you like it, and then trim down the bolt. I use a dremel tool for this, but a hacksaw or other tool of destruction may suffice. Use your best judgement.
Position the lever where it is most comfortable.

Tighten down the locking nut.
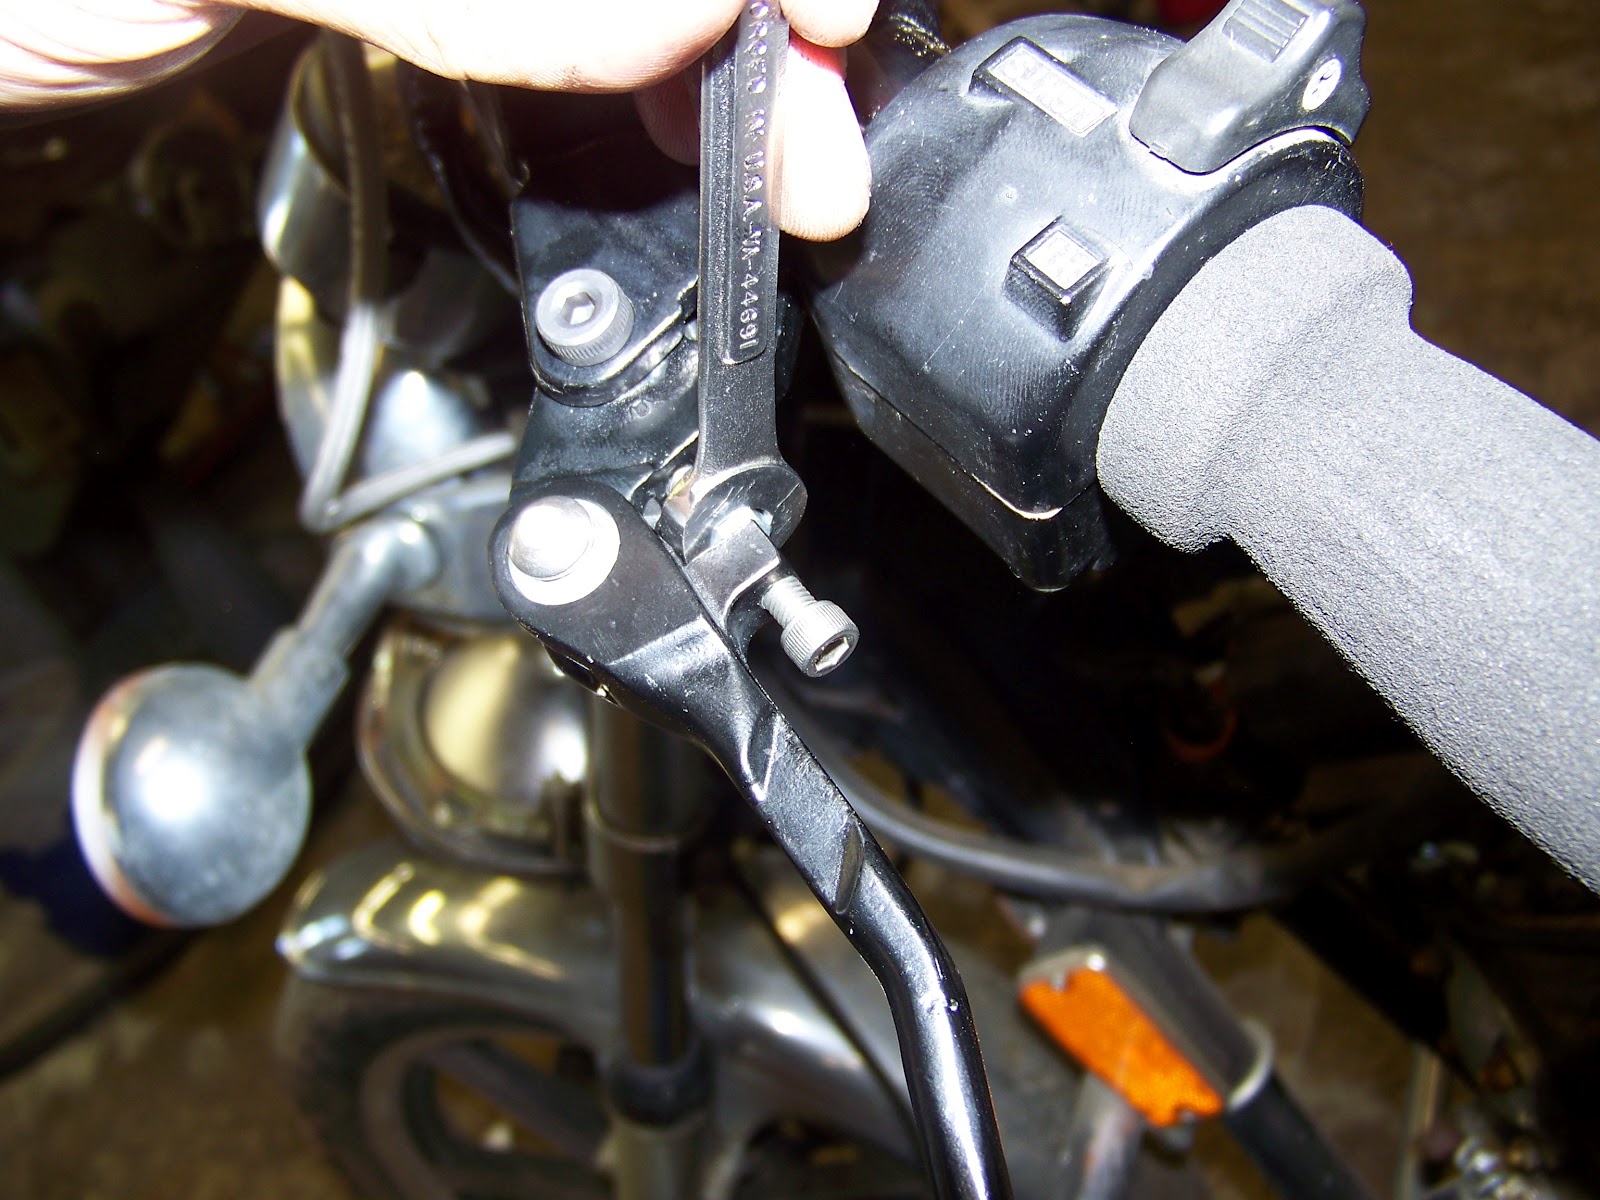
Then using my dremel tool, I trimmed the head of the bolt off. The bolt is stainless, so you don’t have to worry about it rusting and looking bad… It’s the little things that count… (If you are ditching the OEM Control Pods for a “clean” look on your bars, disregard this)
Something like this, and you should be good to go…

Now test to make sure the lever clears the pods at all points of travel. Good to go!
Now, with the OEM Pods, the lever will feel a tad short. To remedy this, trim down the area I have marked in yellow until the lever is as close to the pod as possible. (again, disregard if not keeping the OEM control pods). As with any modification, make sure to take your time, and fit up the parts a few times until you have it just the way you want… Try not to remove any more material than needed.

I used my belt sander, but the dremel tool or a file would do the same job… (PS – I removed a bit too much, but this one works just fine. So don’t do like I did, and rush the job -haha…)

You can now slide the lever as close to the control pods as possible. Just don’t compress the plunger on the clutch lever against the control pod, and you are just about done…
Now, button up the rest of the install by reinstalling your seat, fuel tank, peg and shifter lever. Then crank up the bike and see how the clutch feels bike engaging and disengaging it. Put the bike into first gear, and while idling, let the clutch out slowly and see how it engages. Go for a test ride, in a controlled location (parking lot, field, somewhere safe..) and see if you need adjustments. If not, then you are DONE! If so, keep on reading
The HHB Hydraulic Clutch Conversion is self adjusting, but some initial settings will need to be achieved manually.
To adjust the clutch, loosen the jam nut, and turn the screw clockwise until you feel it “bottom out”. Then back off an 1/8 or a turn or so, and tighten the jam nut.

This should give you an initial setting to work with. From here you can fine tune the clutch engagement/disengagement just as you would stock. The beauty of this system, is that it will never change once you have it set. No more “Hot” or “Cold” adjustments to try and find Neutral, and no more stalling in traffic due to clutch drag…
IF you are putting the bike into gear, while holding the clutch lever in, and the bike creeps forward or eventually stalls – you have air in your system. To bleed the system, you simply remove the side cover from the bike. Leave the slave cylinder in place on the side cover.
Then remove the red cap.
You can pull the lever on the clutch until the cylinder is near the top of the bore. Hold your thumb over the cylinder, and slowly pressurize the clutch lever.

When you see the black seal, you are close to relieving pressure on the cylinder. You may need to hold the rod from the inside to keep the cylinder from retreating in the bore when pumping the clutch lever. Find a friend to help ya if needed.


You will want to wear eye protection and some old work clothes, because the brake fluid almost ALWAYS shoots at your general direction… Something about the stars aligning and the cosmos, I dunno, it’s just the way it is.
When you are certain that you have the air out of the system, then button it all back up, go through the adjustment procedures, and you are set…
As always, thank you for your support of Hugh’s HandBuilt, as we continue to bring your the latest and greatest of XS650 Tech and services…

