How To: HHB Fender Strut Kit
Let’s Get this party started! This kit can be used on both Rigid and Swingarm bikes. It’s a universal kit, so while it’s not 100% brand specific, we’ll be showing you how to use the HHB Fender Strut Kit on an XS650 we are working on.
Why this Dual Upper Bolt Mount kit?
We designed this kit for a few reasons… Mostly due to the multiple builds we’ve been a part of that have had fender mounts rip out, fail, break, etc… Even some of our own (yes, I’m not to proud to admit I’ve made a few mistakes, and learned as I go, it’s how we all get better).
Lots of fender struts use one bolt at the frame, and one bolt at the fender. This allows quite a bit of flex and twist, loosening of hardware, chipping of paint, and eventually fatigue of the fender or hardware. We aren’t saying this will solve any and all chopper problems you might have, but it surely won’t hurt… If you plan on carrying any weight (hey man, no judgement here, but that gal of yours deserves a strong fender mount….) then it’s a no brainer to beef up the fender struts.
Parts needed:
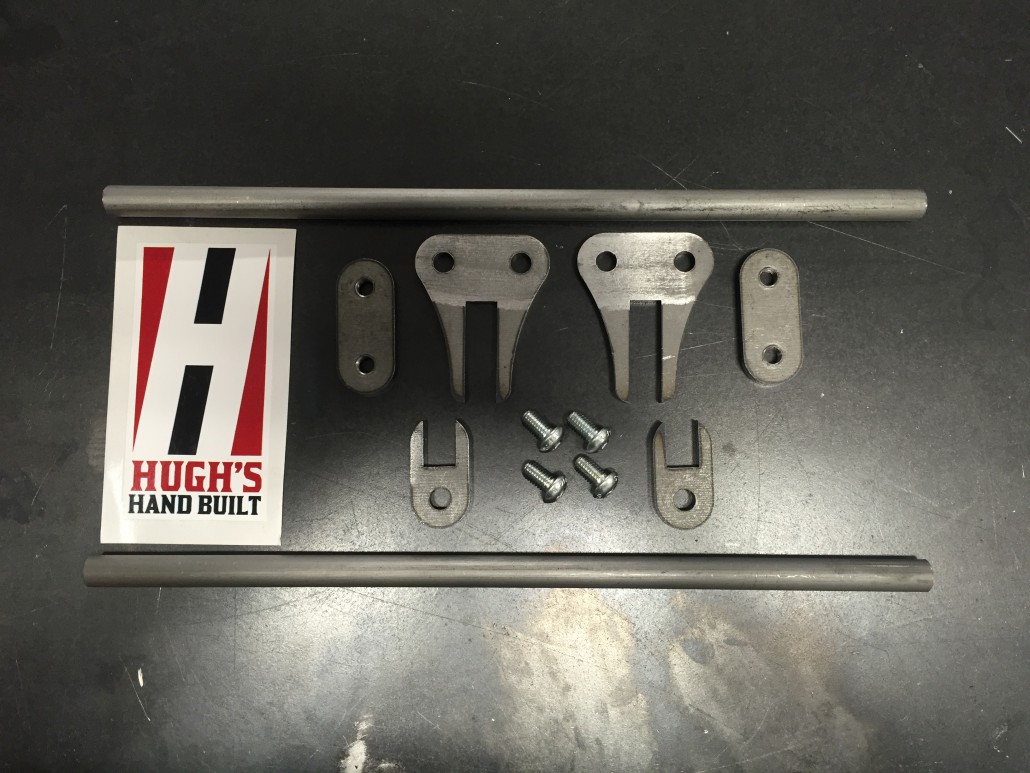
HHB Fender Strut Kit
Motorcycle (of some sort)
Fender (duh…)
Basic Welding and Other Tools Needed:
Welder
Grinder with Cut-Off Wheel (or other method to trim down material to length)
Metal Torture Tools (Vice, Hammers, Torch, etc..)
Sharpie
Drill and drill bits
Skill Level:
If you can weld, you got this…
If not, don’t stress…
Mock it up and make a friend with a welder, you are building a bike afterall, it’ll be needed a few times…
Let’s Get Started!
Get yourself some old chain, some tape, whatever, and mock up the fender on the bike. Make it relatively solid and sturdy. This will let you work with both hands instead of playing “Catch the Fender” 20 times… (Nevermind that I already have the fender strut in place, I’m kinda reverse engineering this How-To Article… Work with me here… )
![IMG_0281[1]](https://www.hughshandbuilt.com/wp-content/uploads/2015/07/IMG_02811-e1435867112197.jpg)
I usually use some painters tape, an old chain, some scrap lumber – you get the idea. There is no “Wrong” way to do this, just set it up to where you like it. If you are far enough along in your build to set it up with the chain tensioned, that’s not a bad idea. Just know that the chain WILL stretch, and the wheel will change location when you retension the chain. And keep in mind that you’ll want to be able to move the wheel all the way forward in the axle slots as well.
![IMG_0282[1]](https://www.hughshandbuilt.com/wp-content/uploads/2015/07/IMG_02821-e1435867239874.jpg)
It’s not rocket science, but I’ve seen a few builds that could have benefited from that small bit of advice… Always remember, you want to be able to ride this thing, so keep it simple… Also remember, tires DO swell at speed, rocks get picked up, and “Crap” happens – so give yourself some room…
We supply 13″ of round stock material with our kits. You won’t use all of it, so play with bends, shapes, designs, that kinda deal… Get creative… (again, pay no mind that I’ve already got a finished version here… You get the idea, and that’s what counts) – I’ve seen straight fender struts and spaghetti looking versions, it all depends on the build. Again, no wrong answers. It’s your build, build it for you…
Ok, you’ve probably held it up against the bike, stood back, changed it a bit, repeated this process and finally found what you like. That’s how we all do it… Sometimes “Looking” is more important than cutting and welding…
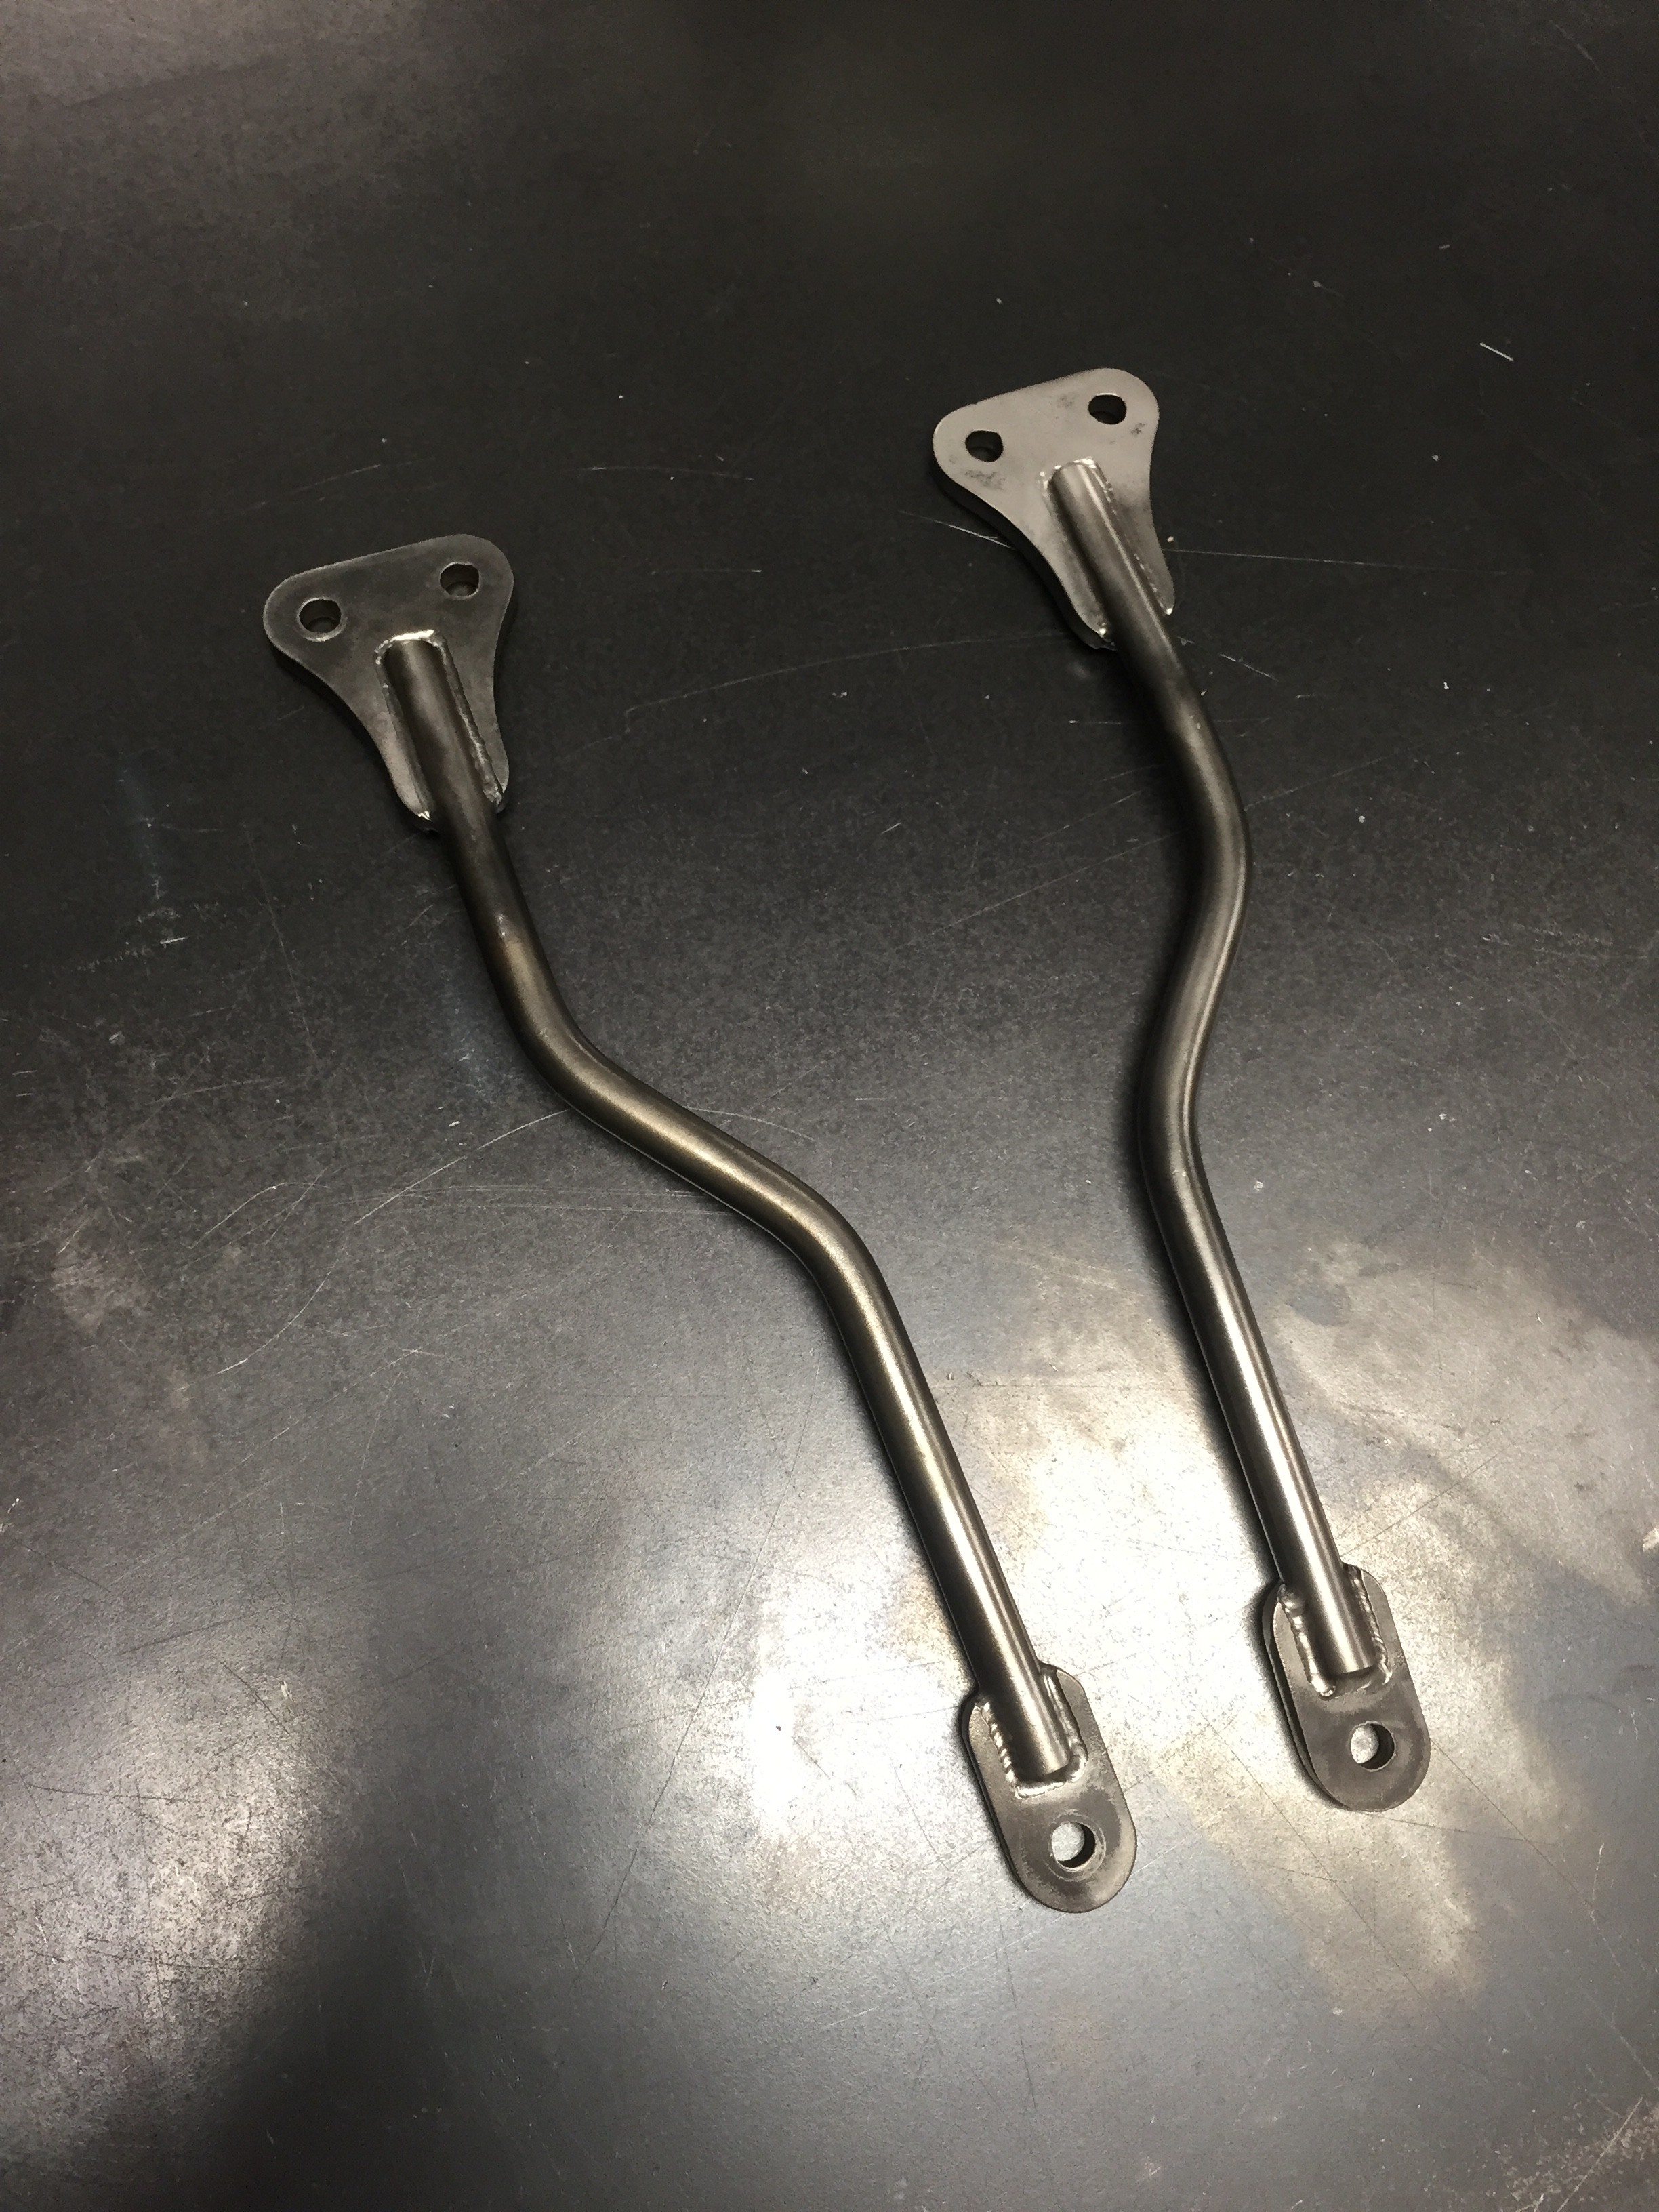 *Disregard the tabs already being welded, focus on the shape of your round stock only at this point
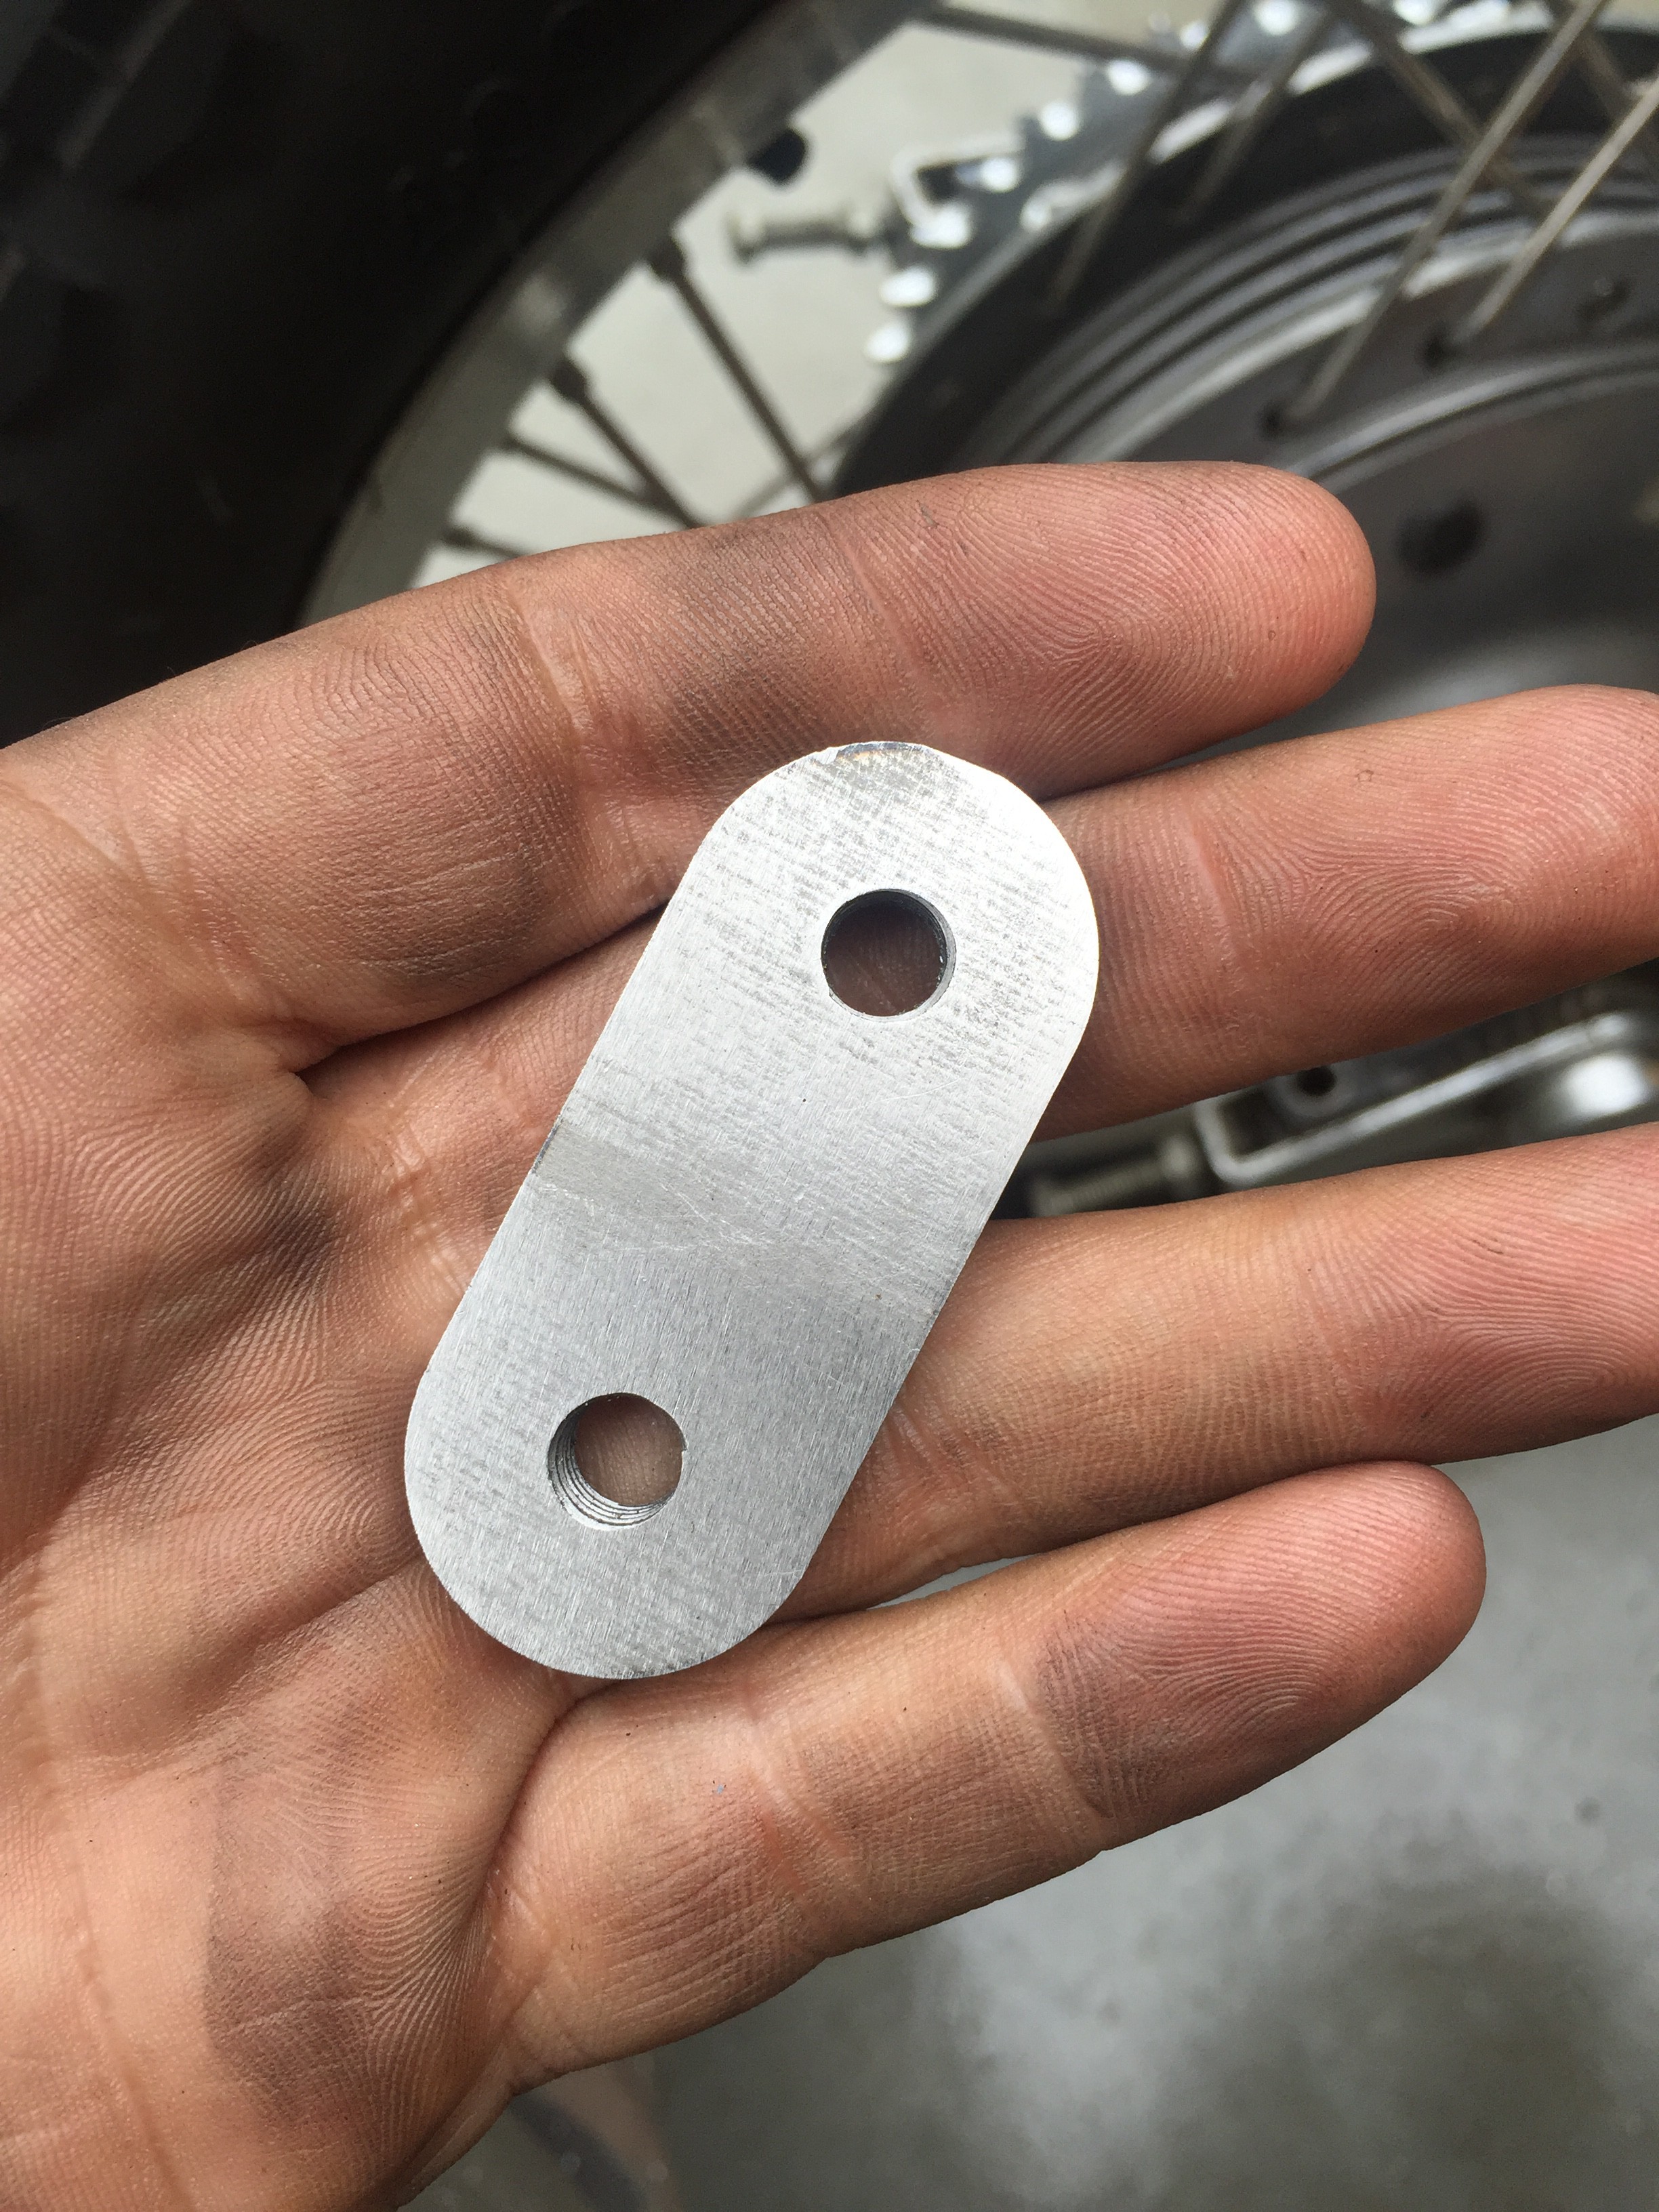
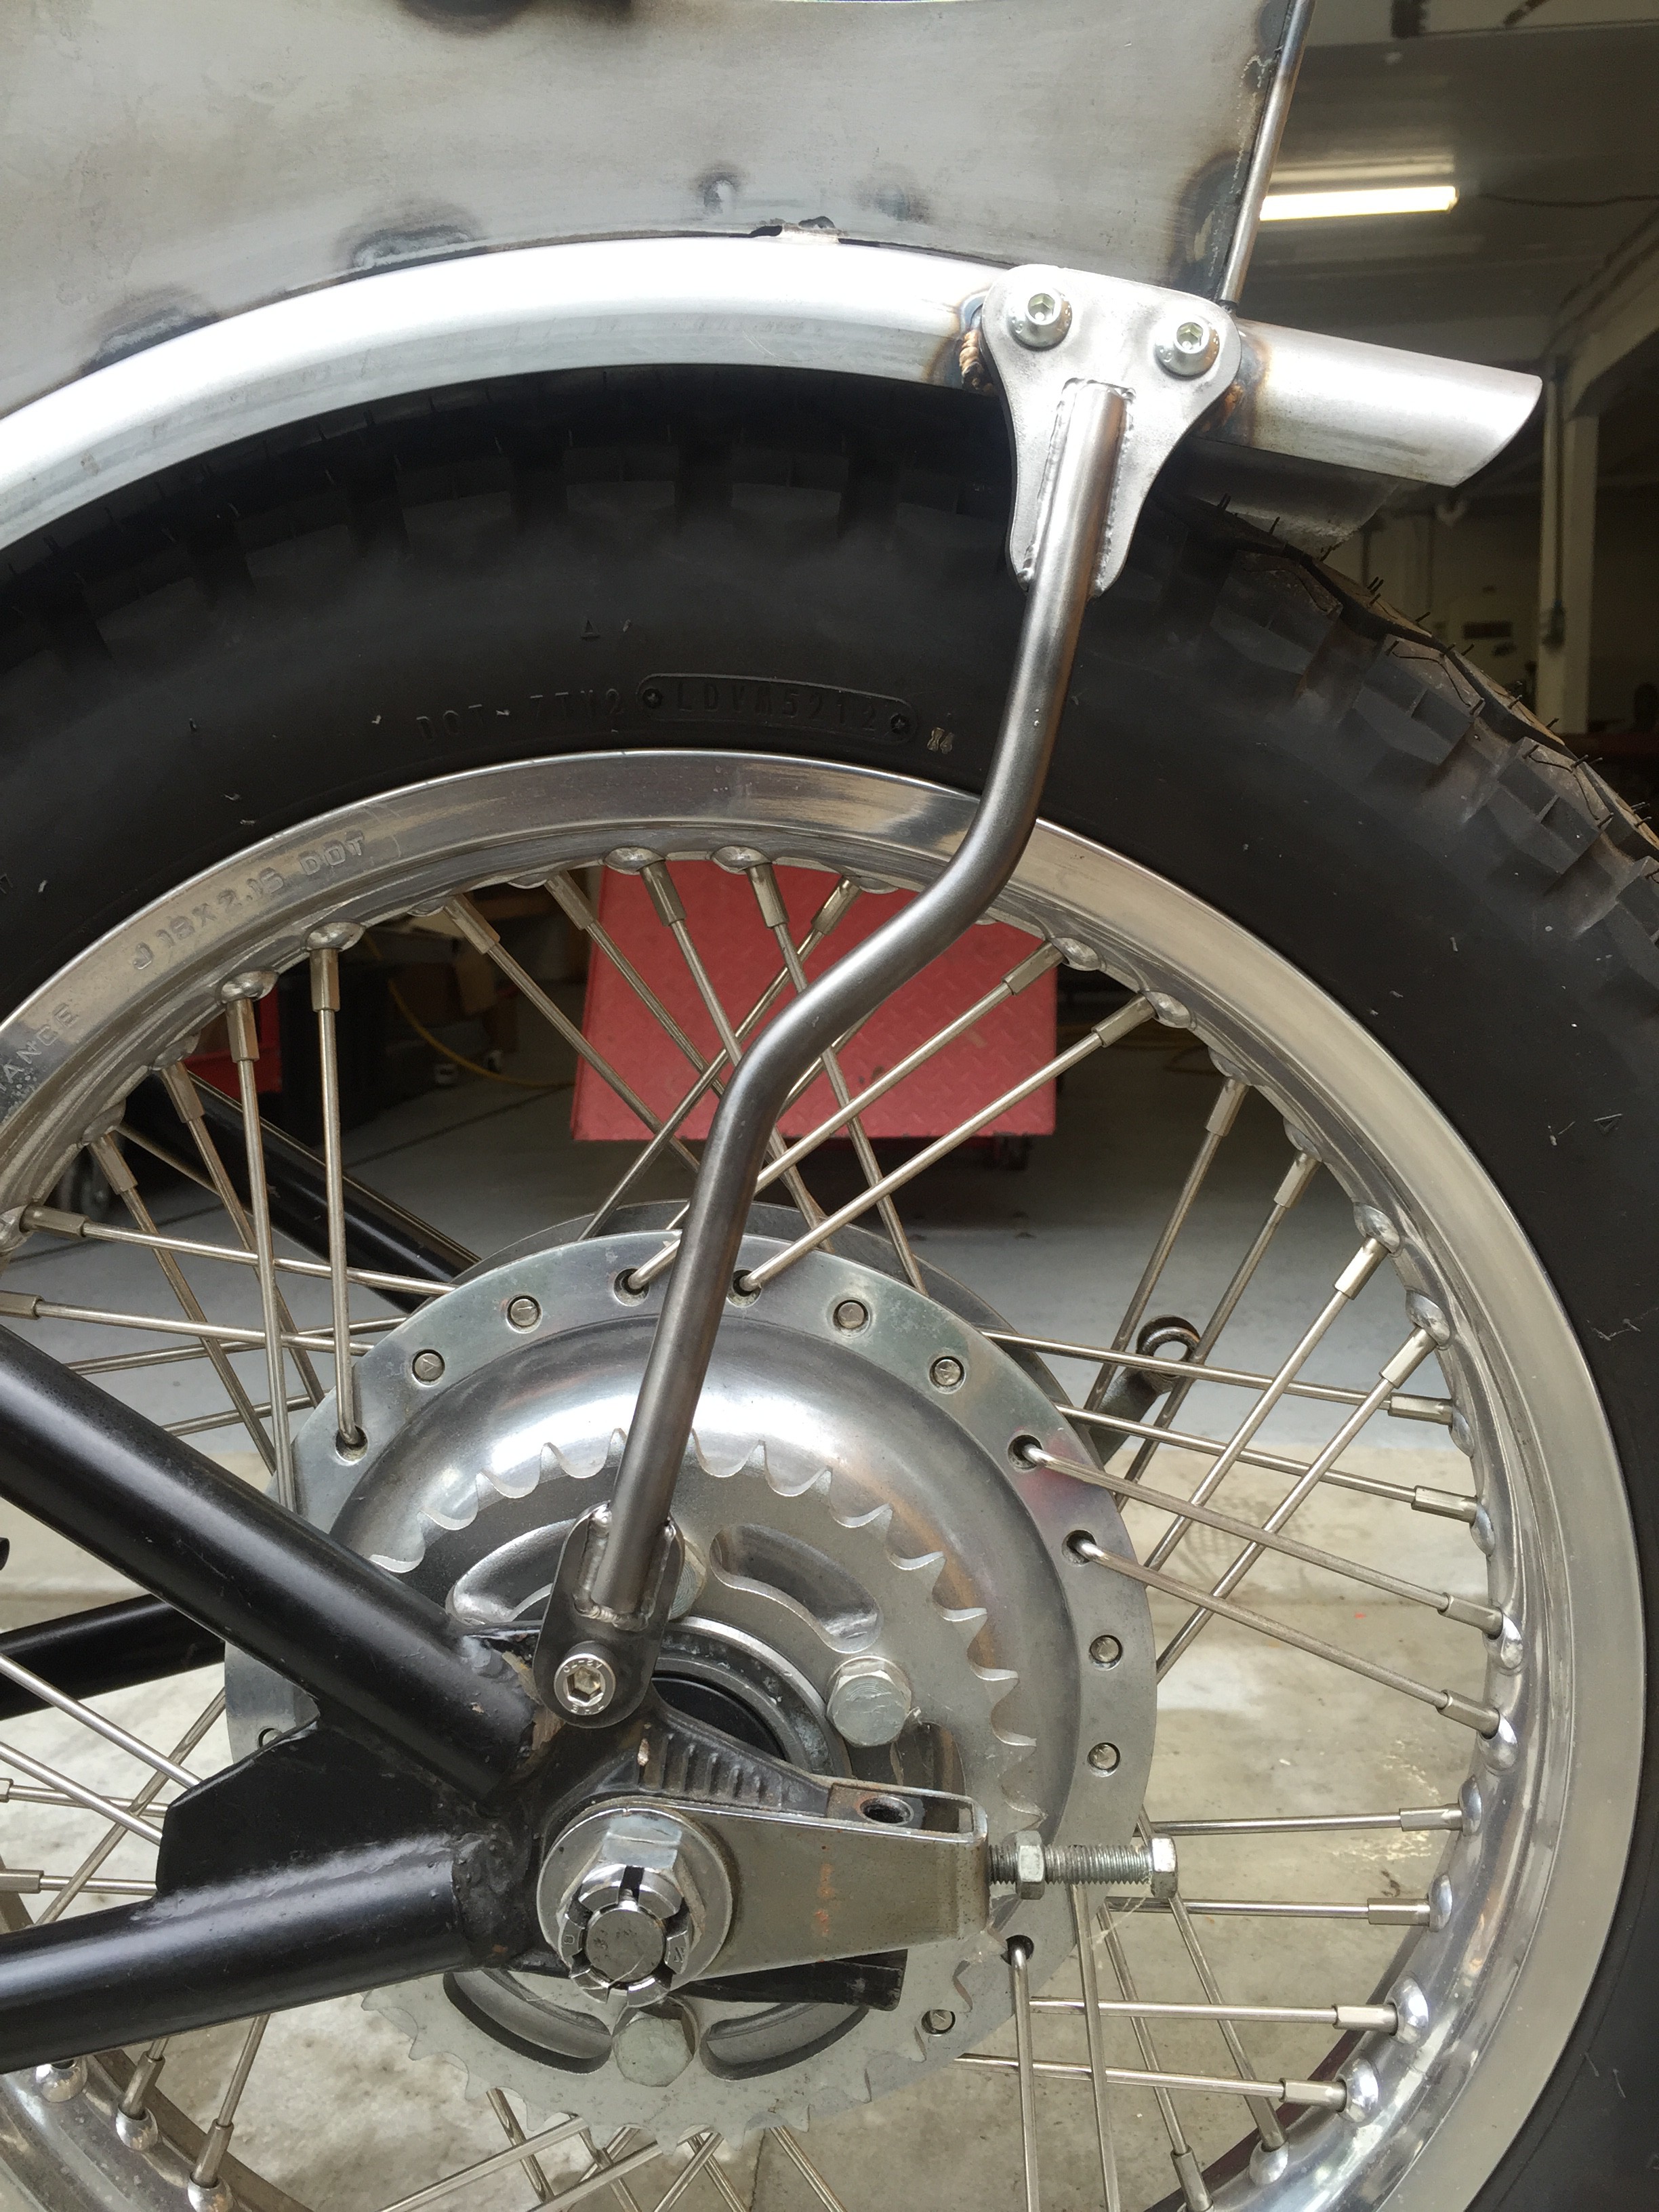
So you’ve got your shape, and you have a rough idea of where you want the upper Dual Bolt Tab to go on the fender. Locate the Pre-Tapped Dual Bolt Mount on the fender, and mark where the holes are using a sharpie, etc.. Then drill holes just a bit larger than the hardware. This will allow the hardware to protrude a bit through the mount, and not push against the materials on the fender itself. Once you are happy with the location, weld the tab to the fender. (And remember, if in doubt, just tac weld it, stand back a few more times and look… No rush here, have fun with this)
Weld that sucker onto the fender.
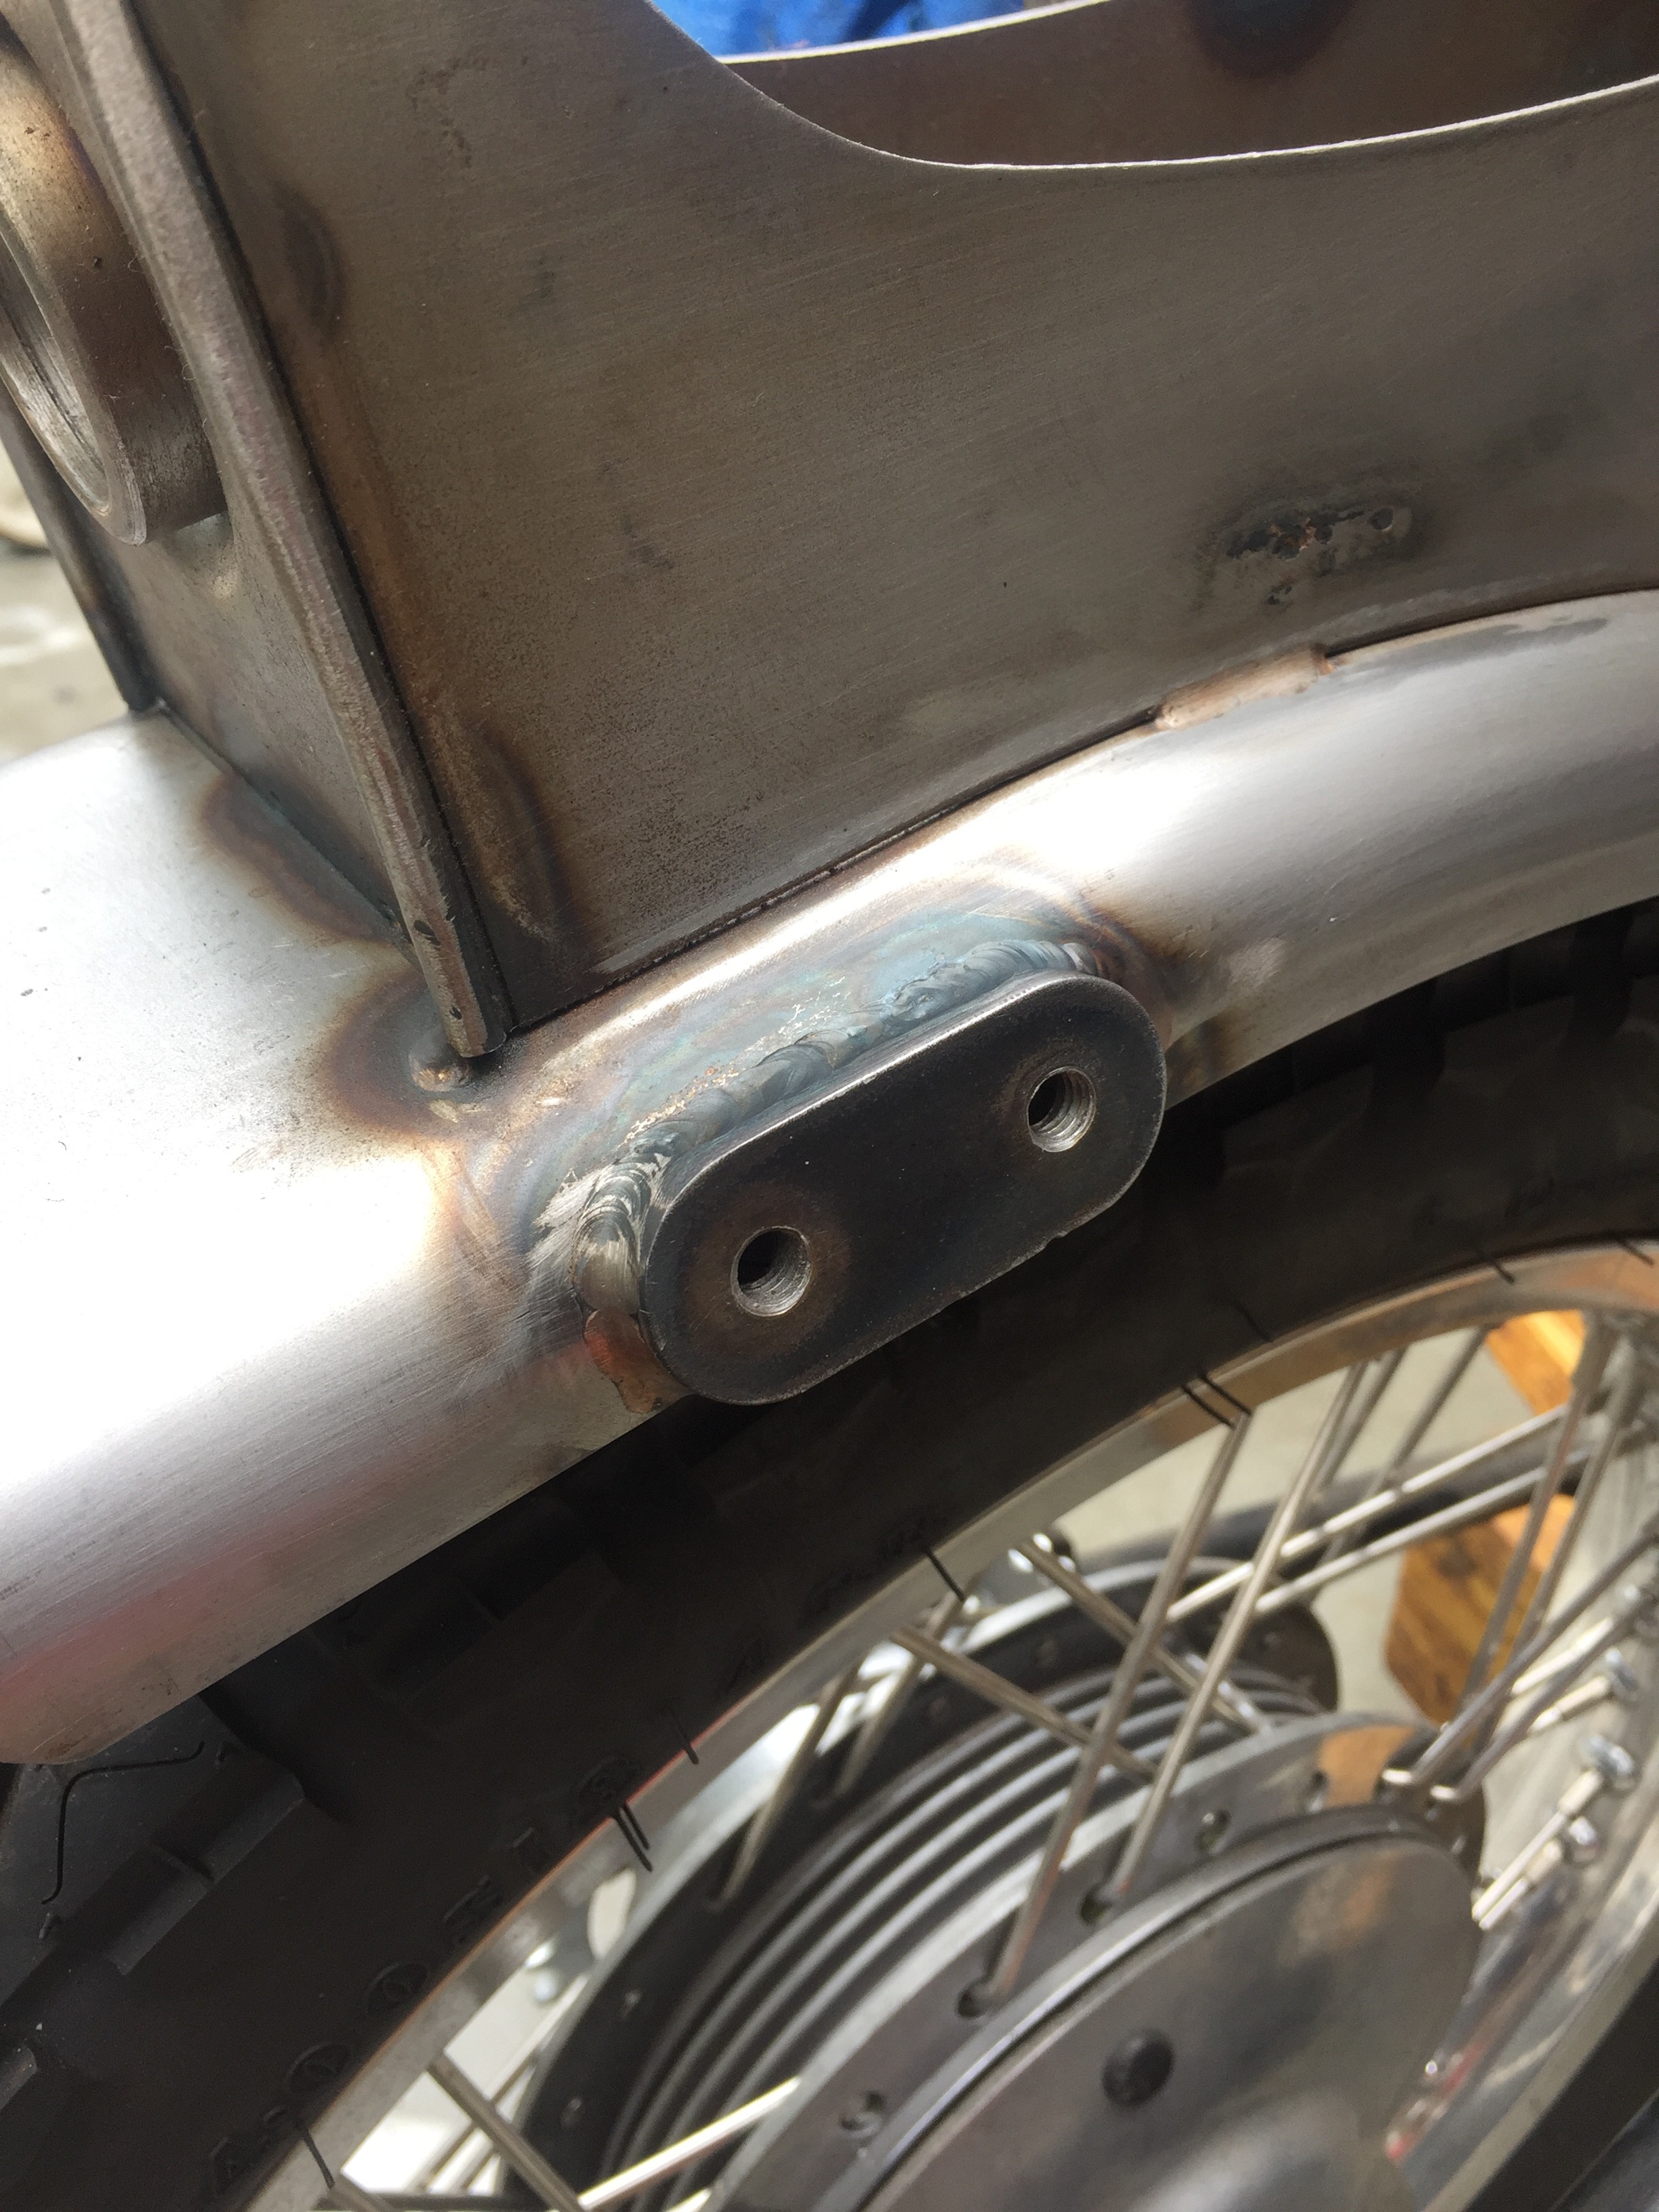
The rest is just locating the lower tab, drilling a hole or welding in a bung on the frame/axle plate to mount it (not supplied, too many variables for that part of each build) and welding up the rest of the fender strut kit. We supply hardware for the upper mounts (they are M8x1.25)
So there ya have it. A sweet setup, strong enough to hold most any amount of weight you might wanna carry, and the Dual Bolt Mount System will keep things from coming loose over time, flexing and tearing up your fender…
As always, thanks so much for your support folks! These kits are available in our store and always remember to have fun with this stuff. Building a bike is awesome, so keep it that way!
Hugh

