
Drilling Rotors
We have made very little progress on Tevan’s Cafe’ build in the last 6 weeks or so. So we started tackling small things in our spare time.
I made Tevan sit down with a sharpie and start marking up his front brake rotor. After about 5-6 different designs, he settled on one he liked, so we took it to the computer to lay it out properly.
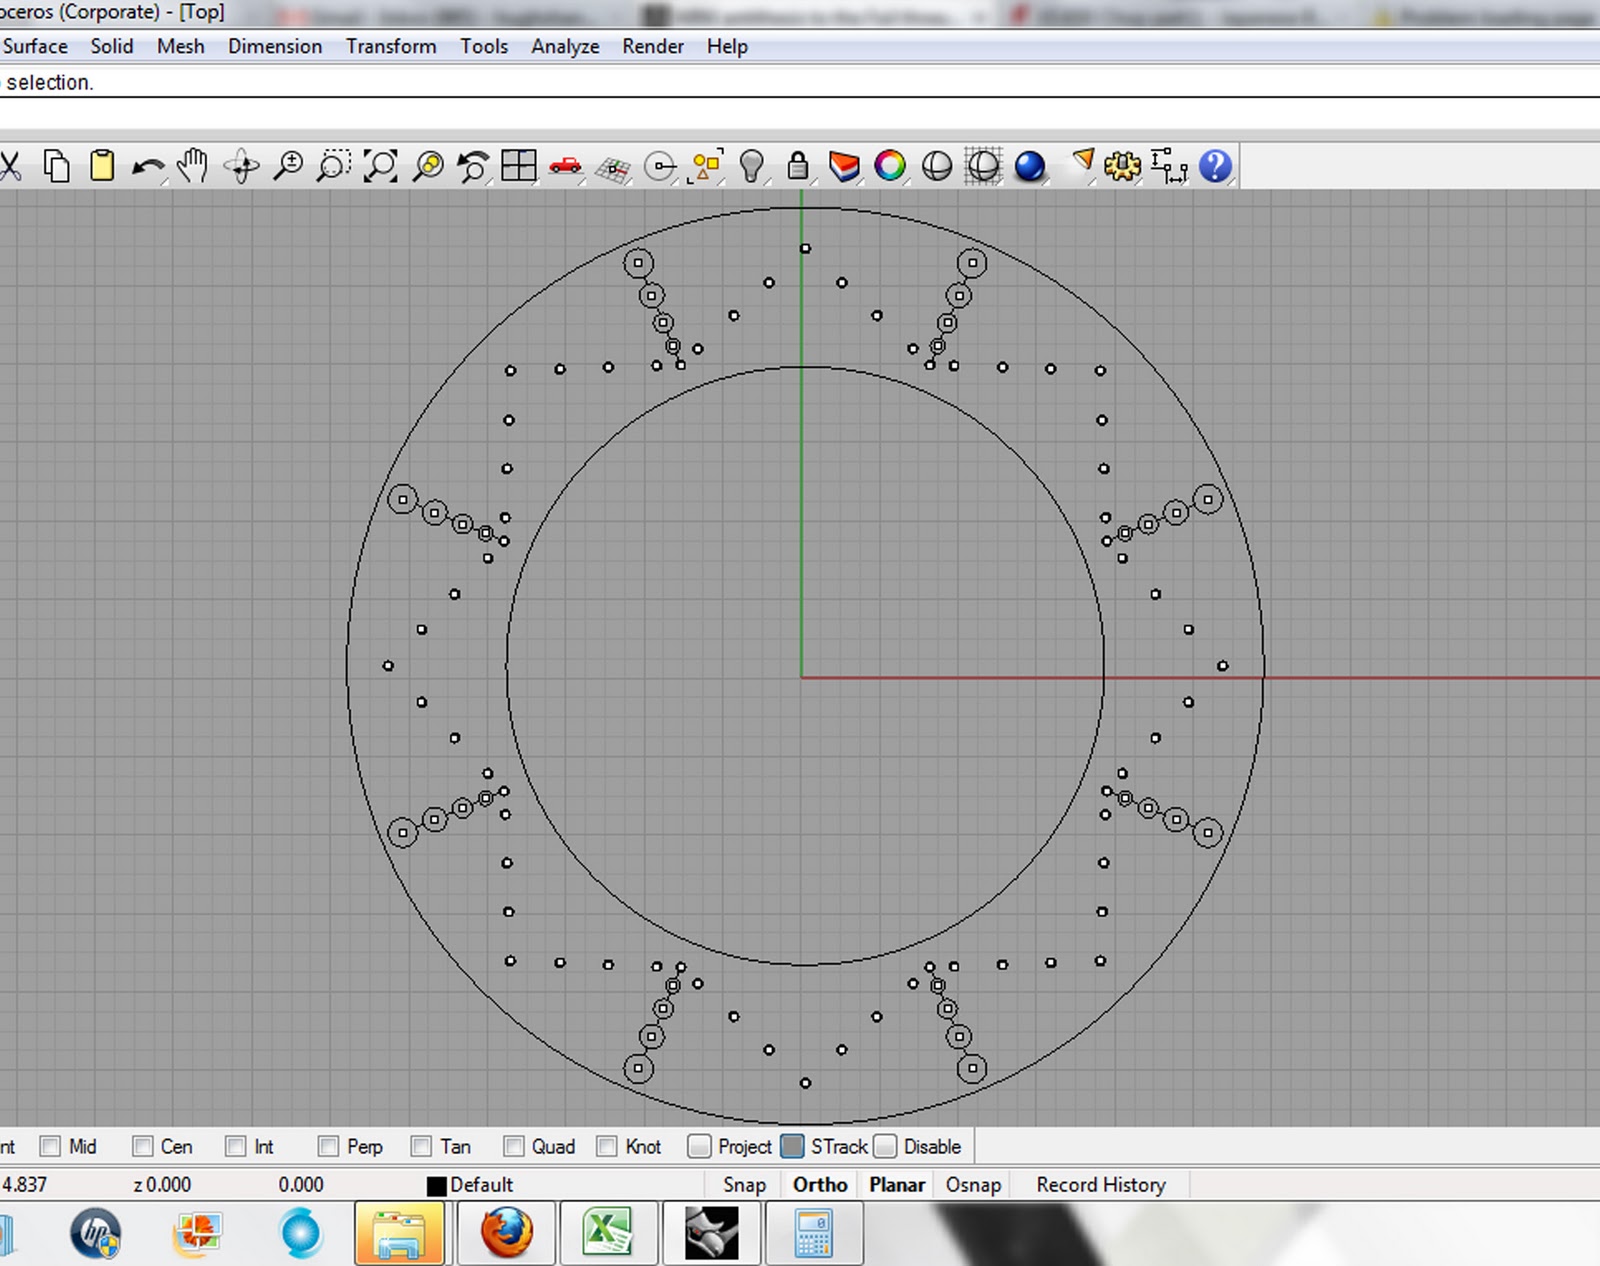
This pattern will make sure that the brake pads are fully swept across the holes. This pattern is more than just ornamental, and will look nice on his vintage style build.
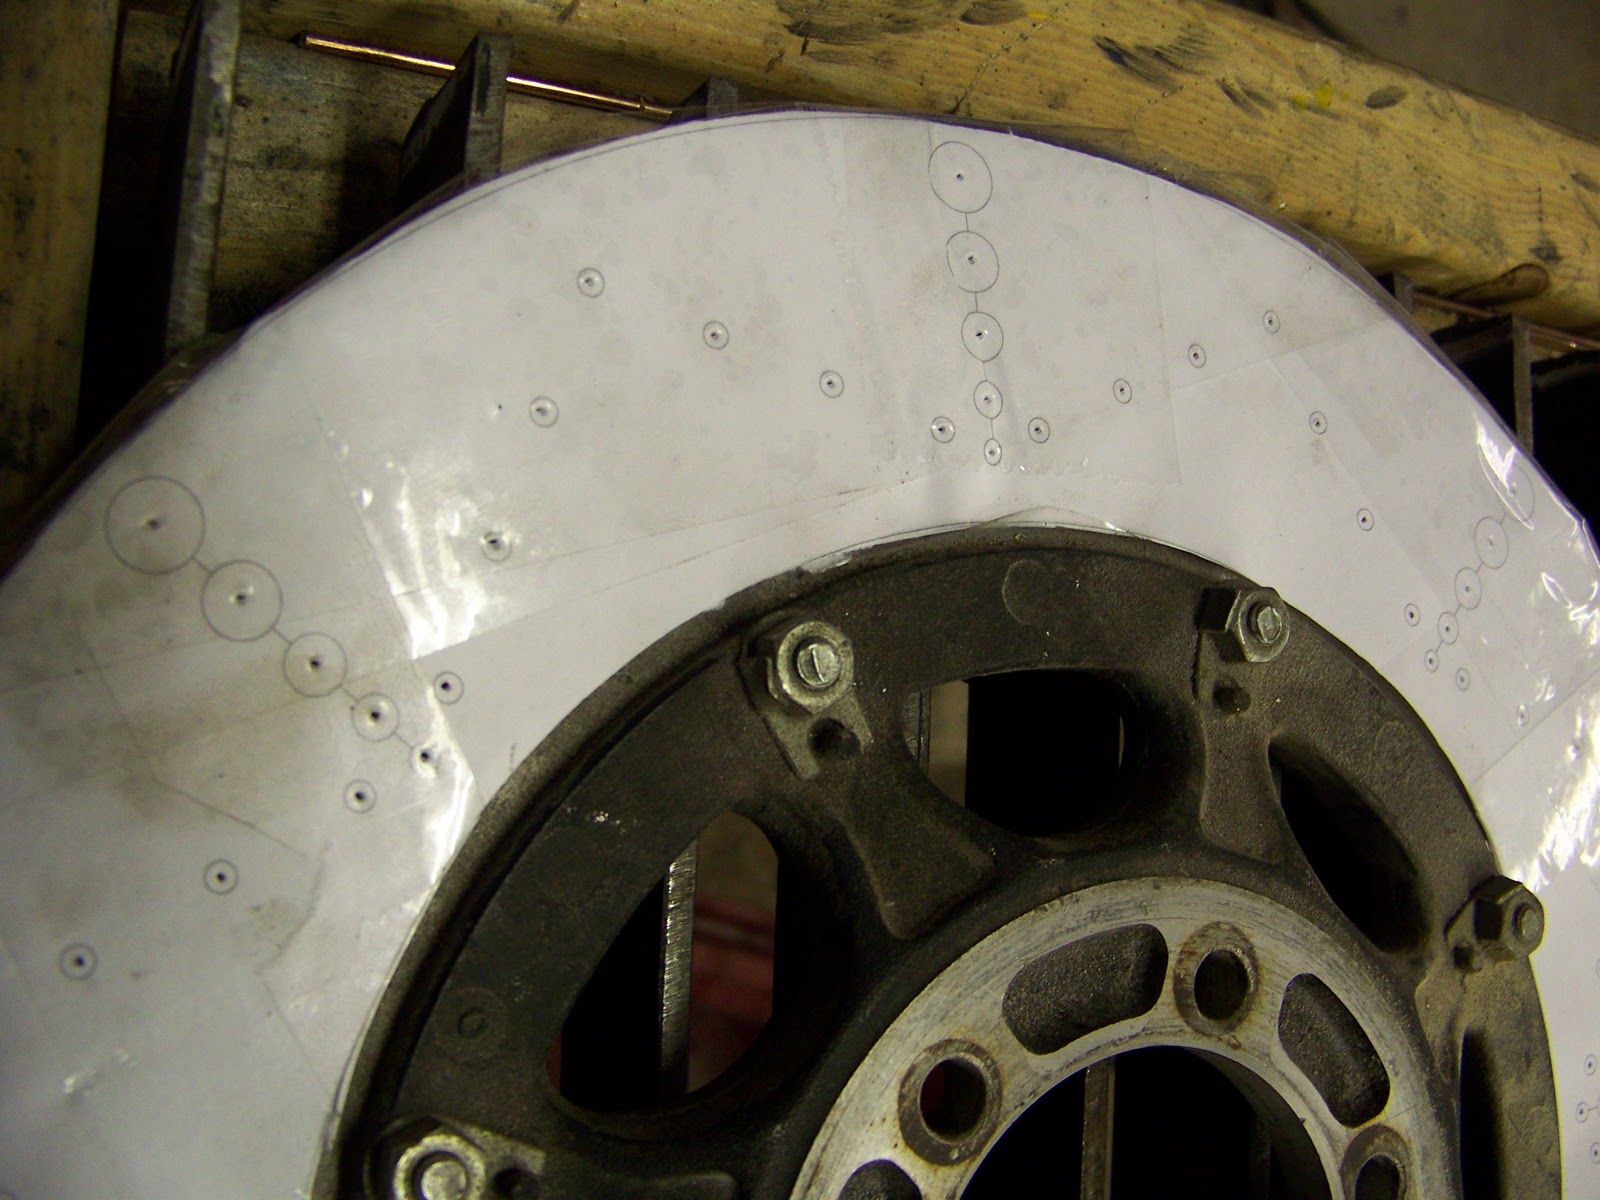
We printed off the pattern, and seeing as how the pattern is larger than standard printer paper, we had to tape 4 sections together. Then we taped that pattern to the rotor.
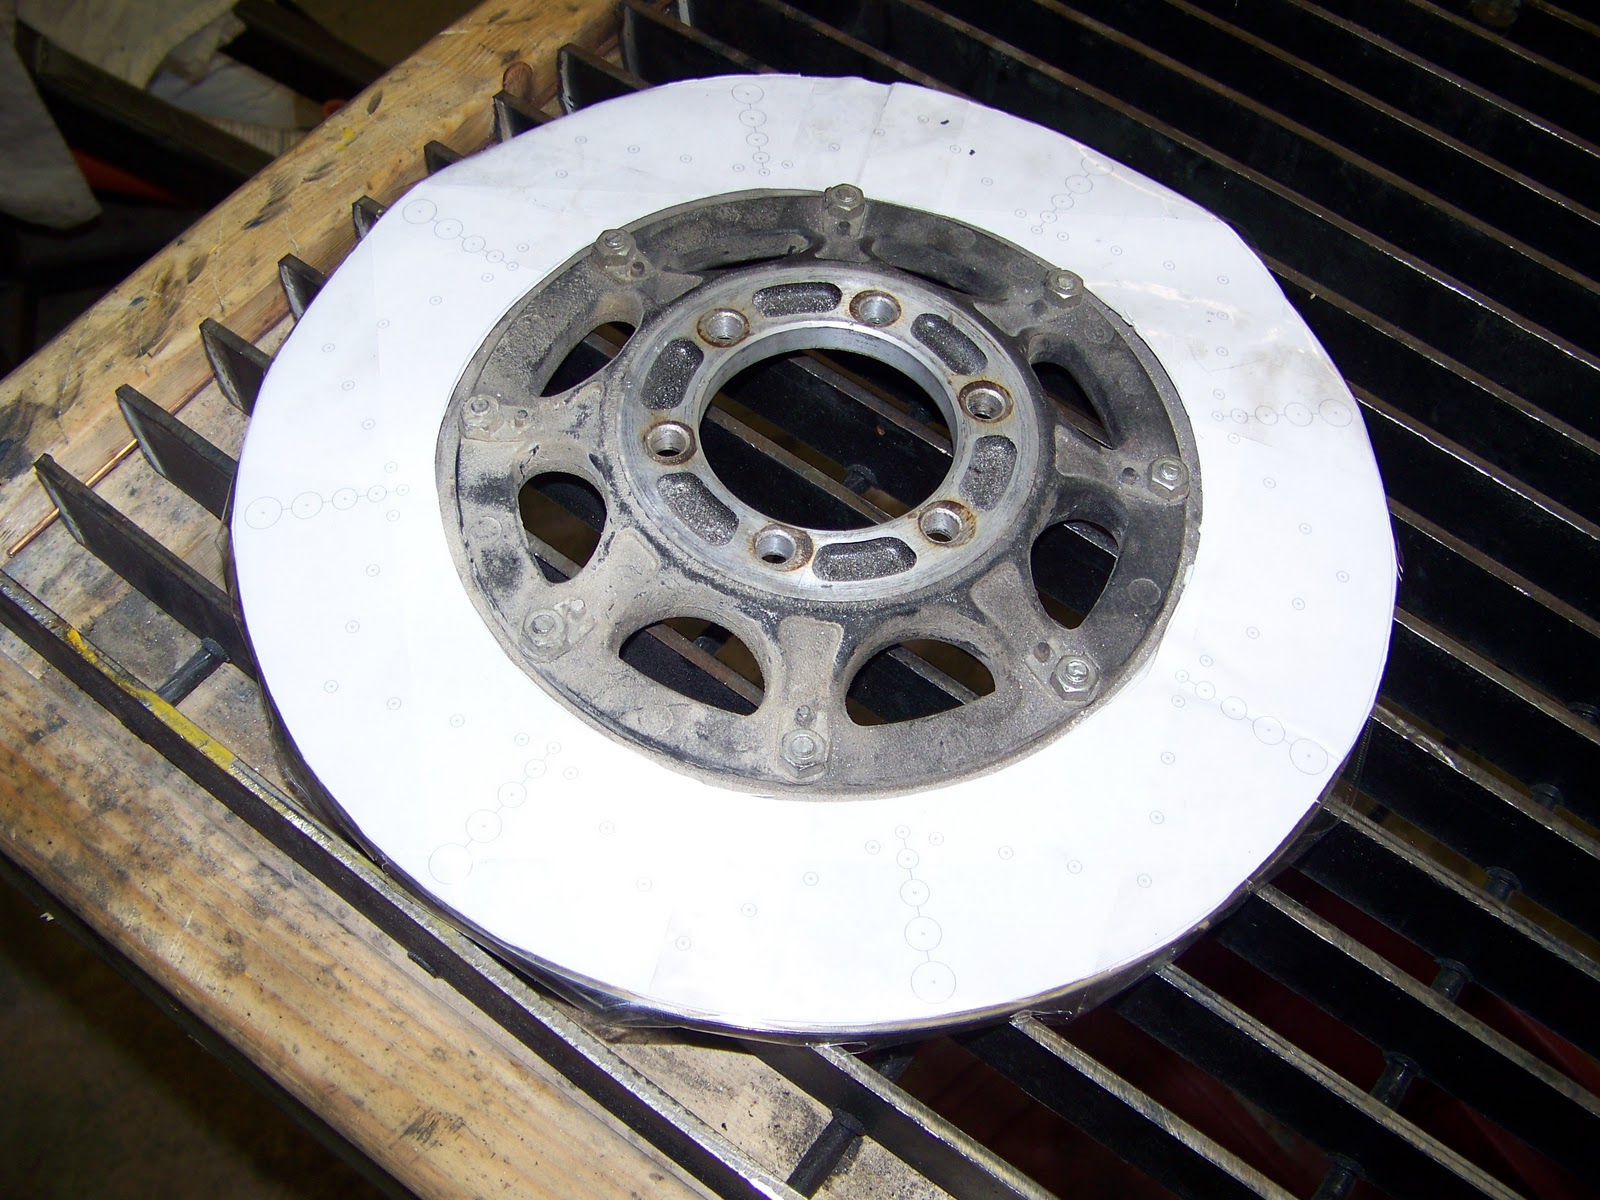
In the drawing, I made sure all the holes had a center location, which we then used to locate and punch the hole centers into the rotor through the paper. Auto punches are NICE for this kind of work, seeing as how we have 100 or so holes to punch.

All punched out, and ready to drill..
Let the drilling commence! *it is worth noting, that these rotors are stainless, and hard as can be on your tooling. Get a supply of GOOD drill bits before attempting this, keep some oil on the bit, and slow down your drill press to the proper speed.

All drilled out, and ready to finish. We will be deburring all the holes, and surfacing the rotor in the next few days.


Very nice